
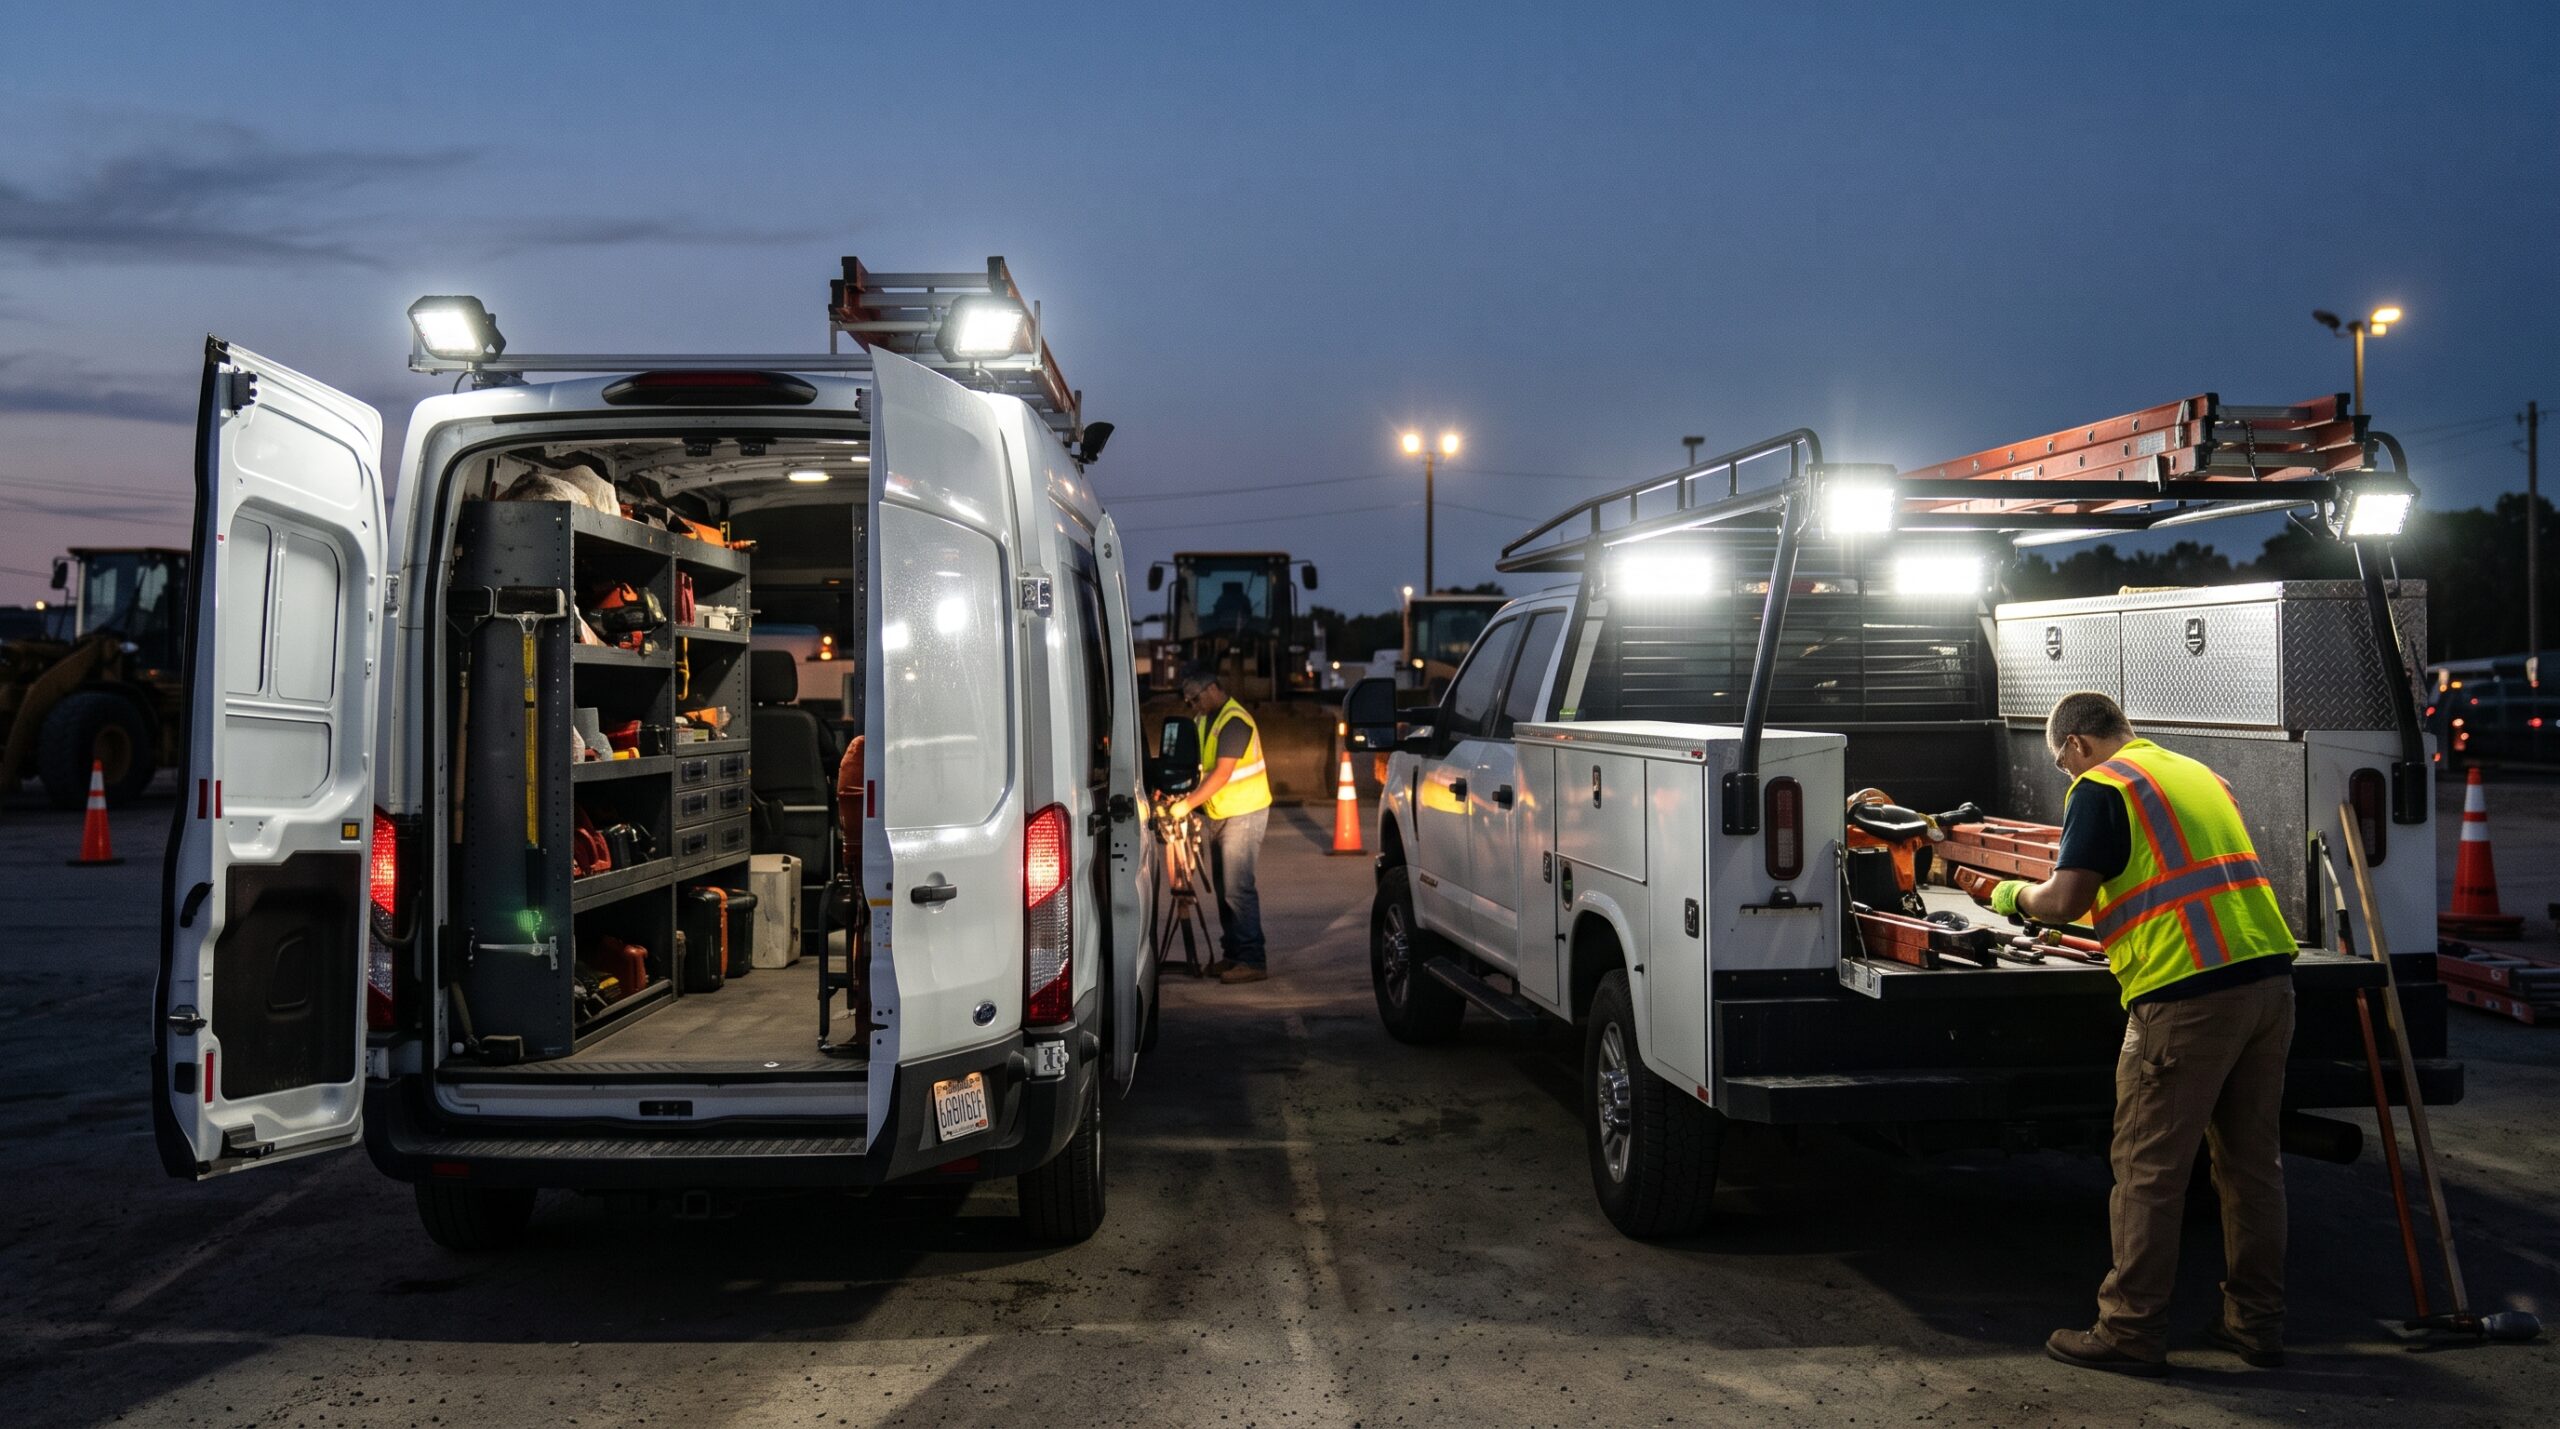
Truck-Mounted LED Work Lights for Service Vans and Contractor Trucks
The first truck mounted work light I ever removed from a customer’s van had melted its own pigtail. The plumber who owned it swore the light was “junk.” In reality, the light was fine. Someone had run it straight off the dome light circuit with thin speaker wire, no relay, and a fuse twice the size the wire could handle. As a result, every cold morning he flipped it on, the wire cooked a little more, and eventually the insulation gave up behind his shelving.
That repair taught me something I still tell every contractor who rolls into my bay: the light itself is maybe half the job. The other half is where you mount it, how you power it, and whether you bought it based on a real number or a marketing number. Get those right and a good LED work lamp will outlast the van. Get them wrong, however, and you’ll be in the dark at the worst possible moment, usually in someone’s driveway at 6 p.m. in November with a water heater on a dolly.
So this guide covers everything I wish service fleet owners knew before they ordered lights online.
Why a Truck Mounted Work Light Earns Its Spot on a Service Vehicle
Home service work doesn’t stop when the sun goes down. HVAC techs answer no heat calls in the evening. Meanwhile, plumbers handle burst pipes after dinner, and electricians restore power during storms when the whole street is black. Similarly, garage door installers often finish the last job of a long day under a porch bulb that barely lights the top step.
In all of those situations, the vehicle is the base of operations. Tools, parts, ladders, and fittings live in it. When you can’t see into the bins, you waste time. Worse, a dark area around the truck means tripping over a hose reel or stepping in a hole you didn’t know was there. And if you’re working curbside, other drivers need to see you and your crew.
A properly chosen truck mounted work light therefore solves three problems at once:
- It turns the back and sides of the vehicle into a usable workstation after dark.
- The walking surface around the truck gets lit as well, which matters more than people think when you’re carrying a compressor or a 40 gallon tank.
- Homeowners, traffic, and the public can see the vehicle and crew more easily.
Handheld lights and headlamps still have their place, and a good rechargeable work light for contractors or a magnetic work light belongs in every van. Even so, they occupy a hand or point wherever your head points. A fixed lamp on the vehicle, on the other hand, stays put and frees both hands for the actual work.
Where to Mount a Truck Mounted Work Light: Reading the Vehicle Like a Job Site
Before I quote anyone on lights, I walk around the van and ask what they actually do back there. After all, mounting location drives everything else: beam pattern, brightness, wiring length, and how much abuse the housing will see.
Rear Truck Mounted Work Light Placement
This is the most requested spot on service vans because it lights the cargo opening, the bumper step, and the area where you stage material. Rear mounted lamps improve reversing visibility and light up loading areas behind the vehicle, which is why commercial vans commonly use them. On a van with barn doors, I like mounting high on the body above the door line, angled down, so the open doors don’t block the beam.
Sides of the Vehicle
If your crew pulls tools from side compartments on a service body, side lights are the ones you’ll use most. In fact, on utility bodies, a small lamp inside or just above each compartment door pays for itself in a week.
Roof or Rack
Roof mounted lamps spread light across a larger working area and reduce shadows. The tradeoff, however, is wiring length and glare. A roof lamp aimed poorly will blind your own crew and the neighbors.
Ground and Step Lights
Small lamps under the rocker panels or rear step light the footing around the truck. Not only are they cheap and low draw, they’re also underrated. Honestly, I’ve seen more ankle injuries from stepping off a dark bumper than from anything electrical.
Interior Cargo Lighting
This isn’t strictly an exterior work light, but it’s worth planning at the same time. Shelving manufacturers now sell integrated strip lighting; Weather Guard’s van shelf lighting, for example, connects directly to the van battery and is activated by a switch mounted on the shelf or bulkhead. Consequently, if you’re rewiring the rear anyway, plan the interior circuit alongside it rather than bolting it on later.
One practical rule applies to every location: mount your truck mounted work light where you can reach it to clean and adjust it without a ladder, unless the job truly requires height. Otherwise, road film coats the lens within a month and quietly steals a surprising amount of output.
Truck Mounted Work Light Brightness: Lumens, Lux, and the Numbers on the Box
This is where most buying mistakes happen, and it’s not the buyer’s fault. Frankly, the industry has made the numbers confusing on purpose.
Raw Lumens Versus Effective Lumens
You’ll see two kinds of lumen ratings: raw and effective. Raw lumens are a theoretical figure, calculated by multiplying the number of LEDs in a light by their maximum output rating. In other words, that number ignores heat, the lens, the reflector, and the driver electronics.
Real world factors can reduce light output by as much as 75 percent, whereas effective lumens are actually measured with photometry equipment and account for those losses. Heat makes things worse still. LED makers typically measure output after 25 milliseconds, while vehicle specifications require measurement at 10 and 30 minutes once temperature stabilizes, which usually shows 10 to 20 percent less light than advertised.
Here’s how that plays out in my shop. A customer brings in two lights; one box says 6,000 lumens and cost $35, while the other says 1,800 lumens and cost $140. Nine times out of ten, the expensive one puts more usable light on the ground, because its number is effective and the cheap one’s number is raw. For that reason, I only trust manufacturers who publish effective lumens and a beam diagram. When a seller lists one big lumen figure and won’t say which kind it is, assume raw.
How Much Light a Truck Mounted Work Light Actually Needs
Lumens describe the total light coming out of the lamp. Lux, by contrast, describes how much light lands on a surface at a given distance. For work lighting, therefore, lux at a stated distance tells you more about whether you’ll be able to read a model number on a condenser label from 10 feet away. Our guide to work light lumens offers a deeper breakdown.
For a typical service van, a pair of rear lamps in the range of 1,000 to 2,500 effective lumens each is plenty for staging and loading. Go higher on the roof if you light a wide work area, such as a landscaping crew or a roofing setup. Keep in mind, though, that more is not always better. Excess light behind a van at night creates harsh shadows and glare that make close work harder, not easier.
Choosing a Beam Pattern for Your Truck Mounted Work Light
The beam pattern matters just as much as the brightness.
- Flood spreads light wide and short. That’s what you want behind a van, alongside a utility body, and almost anywhere close to the vehicle.
- Spot throws a narrow beam a long way. It’s useful for a contractor who needs to see down a long driveway or across a lot; on most home service trucks, however, it’s the wrong choice. Aimed at the cargo area, a spot creates one blinding hot circle surrounded by dark edges.
- Wide flood or trapezoid patterns are designed to spread horizontally with a fairly flat cutoff. These are my favorite for rear mounting because they light the bumper and the ground without throwing light into the sky.
So if you only buy one lamp, buy a flood. In my experience, I’ve swapped out more spot lights on service vans than any other single part, usually because someone bought what looked brightest on a video.
Truck Mounted Work Light Color Temperature and Glare
Most LED work lamps run between 5,000K and 6,500K, which reads as a cool, slightly blue white. That color is crisp for seeing detail. At the same time, it can feel harsh, and it bounces hard off fog, rain, and snow.
For home service work, I lean toward lamps in the 5,000K to 5,700K range. That way, you still get good color rendering for reading wire colors and labels, without the bluish glare. Electricians in particular should care about this, since telling a red wire from an orange one under a cheap 6,500K lamp is genuinely harder than it should be.
Some lamps now offer a selectable amber mode, which is also helpful in fog and dust. That’s a nice extra, though not a requirement.
To limit glare, aim lamps down and slightly outward. Then try a simple test: stand where your neighbor or a passing driver would stand. If you’re looking straight into the LEDs, tilt the lamp down.
Truck Mounted Work Light Sealing: What IP67 and IP69K Really Mean
Every lamp you look at will have an IP rating. The first digit covers dust, and the second covers water. What trips people up, however, is assuming a higher number means better protection across the board. Our waterproof work light guide covers the ratings in more depth.
Immersion Versus Pressure Washing
IP67 and IP68 cover immersion, while IP69K covers pressure spray; they test different conditions. Specifically, IP67 means temporary immersion up to 1 meter deep for 30 minutes, and IP69K only certifies resistance to high pressure, high temperature jets, with immersion covered separately by IP67 for temporary and IP68 for continuous submersion.
Why does that matter on a service van? Simply put, fleets get pressure washed. An IP69K lamp is designed to survive a pressure wash at 80 to 100 bar and 80°C from four angles, whereas an IP67 lamp does not tolerate high pressure cleaning or hot water. So if your company sends trucks through a wash bay, or a crew member blasts the rear doors every Friday, an IP67 only lamp will eventually let water past the seal.
My recommendation for any truck mounted work light on a commercial vehicle, then, is a dual rating: IP67 and IP69K together. IP69K lamps typically cost 10 to 25 percent more than equivalent IP67 lamps, which is nothing compared to replacing a fogged lamp and the connector it corroded.
Housing Details Worth Checking
Beyond the IP rating, a few more housing details deserve attention:
- Die cast aluminum body with real cooling fins. Since heat kills LEDs, a heavy, finned housing is a good sign.
- Polycarbonate lens rather than glass for anything mounted low, because it handles stone strikes better.
- Stainless mounting hardware. Zinc plated bolts on a rear bumper rust in one winter of road salt.
- Breather vent. This small membrane lets the housing equalize pressure without pulling in moisture; without one, lamps tend to fog after heat cycles.
- Sealed connector, ideally a Deutsch style plug, or at least a pigtail long enough to put the splice somewhere protected.
The Electrical Side: Wiring a Truck Mounted Work Light Properly
This is my world, so I’ll be direct. Most work light failures I see are wiring failures, not lamp failures.
Use a Relay
Even though LEDs draw less power, it’s still better to use a relay rather than running full current through a simple switch. Ideally, the relay sits close to the power source and the lamps, while the dash or bulkhead switch only carries a tiny trigger current. As a result, a smaller, cheaper switch lasts longer, and you avoid running heavy current wire all the way into the cab.
Fuse at the Source
A relay does not replace a fuse: the relay controls the circuit, the fuse provides overcurrent protection, and a properly designed auxiliary light circuit normally needs both. Place the fuse within about 7 inches of the battery or power stud. Remember, too, that the fuse exists to protect the wire, so size it to the wire rather than just the lamps. If the fuse is rated too high, it won’t blow when needed, which is exactly what happened in that plumber’s van.
Do the Math
LEDs are efficient. Nevertheless, a pair of large lamps still pulls real current. To find it, divide watts by volts. For example, a 40 watt truck mounted work light on a 12 volt system pulls about 3.3 amps, so four of them pull about 13.3 amps. In that case, I’d fuse the circuit at 15 or 20 amps and run wire rated comfortably above the fuse.
Size Wire for Length, Not Just Load
No single wire gauge works for every light, because the right size depends on the capacity of the fuse, relay, and connectors as well as the load. Run length matters too. Rear lamps on a long cargo van might sit 18 or 20 feet of wire from the battery, and that distance causes voltage drop. Consequently, LED drivers that see low voltage either dim or flicker. I aim for no more than 3 percent drop, which on most rear van installs means 12 AWG for the feed, even when the amp draw suggests 14 AWG would do.
Equally important, use automotive grade wire: stranded copper, with insulation rated for heat and oil, such as GXL or TXL. Never use household solid core wire, because it work hardens under vibration and cracks.
Grounds Are Where Gremlins Live
Run a dedicated ground wire from the lamp back to a clean chassis point or, better yet, to the battery negative or a ground bus. Before bolting it down, scrape paint to bare metal, use a star washer, and coat the joint afterward. Indeed, a huge share of the “my light flickers” calls I get are fixed with a better ground.
Route and Protect the Harness
Next, loom the wire, grommet every hole through sheet metal, and keep it away from exhaust and moving parts. Secure it every 12 to 18 inches. Finally, use heat shrink butt connectors with adhesive lining instead of plain crimp splices wrapped in electrical tape.
Check for Factory Provisions
If you’re upfitting new trucks, see what the chassis manufacturer offers first. Some trucks come with prewired provisions. Volvo, for instance, offers work lamp preparation kits that include pre routed cables and a dashboard switch, with a maximum load of 280 watts. Using a factory provision like that saves labor and also keeps the warranty conversation simple.
Running a Truck Mounted Work Light Without Draining the Battery
A service van often sits with the engine off while the crew works, and that’s where battery drain bites you.
So run the numbers before you add lights. Say you have four lamps pulling a combined 13 amps, and the crew works two hours with the engine off. That adds up to 26 amp hours. A typical lead acid starting battery might be rated around 70 to 100 amp hours; however, you shouldn’t drain one much past halfway if you want it to crank the engine and survive the year. Add an interior shelf strip, a phone charger, and a laptop, and suddenly you can leave a crew stranded.
Depending on the fleet, I recommend one of these options:
- A low voltage disconnect on the lighting circuit that cuts power when the battery drops to a set point, preserving enough charge to start the engine.
- An auxiliary battery with an isolator or DC to DC charger, so the work lights draw from a separate battery and the starting battery stays protected.
- A timer relay that shuts off rear lamps after a set period in case someone forgets.
- A door or ignition interlock so lights only run under specific conditions.
For most single van operators, a simple low voltage disconnect is the best value. For fleets with strict idle restrictions, on the other hand, the auxiliary battery setup pays off quickly.
Truck Mounted Work Light Radio Interference: The Problem Nobody Mentions
Here’s one that catches even experienced installers. Cheap LED lamps use switching driver circuits that can throw off electrical noise. In practice, that noise shows up as static on AM and FM radio, interference on two way radios, and sometimes trouble with GPS and backup cameras.
This isn’t a myth or a one off complaint, either. Government testing confirmed that LED lights can be a source of interference for marine radio and navigation systems. The same physics applies on a work truck.
The relevant automotive standard family is SAE J1113. Notably, J1113/41 covers test limits and measurement methods for radio disturbance from vehicle components and modules, narrowband, from 150 kHz to 1000 MHz. Lighting manufacturers who take EMI seriously test to standards like this; J.W. Speaker, for example, lists radiated emissions and conducted emissions on DC power leads under J1113 among its EMI testing capabilities.
My practical advice, therefore: if your crews use two way radios or rely on the truck’s GPS for dispatch, buy a truck mounted work light that states EMI compliance on the spec sheet. If you already have noisy lamps installed, a better ground and a ferrite choke on the power lead can help. Ultimately, though, the real fix is usually replacing the lamp.
Road Use and Legal Common Sense
Work lamps are work lamps, not driving lights. Most U.S. states restrict auxiliary lamps while the vehicle is moving on public roads, especially white lamps facing rearward and high mounted lamps that could dazzle other drivers. Because rules vary state to state, I won’t pretend there’s one answer.
Still, one simple habit keeps you out of trouble: wire the work lights so they shut off when the vehicle is in drive, or at least add a dash indicator so the driver knows they’re on. Over the years, I’ve installed park interlock circuits on plenty of fleet vans for exactly this reason. Besides, it prevents the classic mistake of a tech driving three blocks with rear floods blinding the car behind.
Adding amber warning lights alongside work lamps is a separate conversation with its own rules. Before installing anything that flashes, check your state’s vehicle code and your insurance carrier’s guidance. For lighting rules once you’re parked and working, see our overview of job site lighting requirements.
Matching the Truck Mounted Work Light Setup to the Trade
Every trade uses its truck differently. With that in mind, here’s how I’d set up a starting package for common home service work.
HVAC
Start with rear flood lamps for the cargo area plus a ground light at the rear step. HVAC techs haul heavy equipment, refrigerant tanks, and tools in and out repeatedly, so clean footing is a priority. Additionally, if you work rooftop units on light commercial buildings, a single roof mounted flood helps with staging. For portable options inside the equipment, see our guide to the LED work light for HVAC technicians.
Plumbing
Here, rear floods and good interior shelf lighting matter most. Plumbers tend to dig through bins of fittings, which means seeing inside the van is as important as lighting outside it. Water heater swaps also happen in driveways, often after dark, so a wide flood behind the truck is a must. Our roundup of work lights for plumbers covers the handheld side.
Electrical
For electrical contractors, I suggest rear and side floods with a neutral color temperature for reading wire colors. Storm response work means long hours in dark neighborhoods; consequently, EMI compliant lamps are essential to keep radios clear. A pole or roof light is also worth considering for service drop work. For panel and attic work, pair the truck setup with the best work lights for electricians in tight spaces.
Garage Door and Window Installers
These crews often work across a full driveway width. Accordingly, a wide flood pattern on the rear plus one on the curb side gives them broad, even coverage.
Landscaping and Irrigation
Roof or rack mounted floods provide wide area coverage. In addition, these trucks see mud, dust, and pressure washing every week, so an IP69K rated truck mounted work light is worth the money.
Roofing
Finally, roofers benefit most from rack lights aimed down at the ladder and loading zone. Ladder work in poor light is risky enough, so don’t add a dark base to the problem. Away from the truck, a tripod work light for the job site fills in the gaps.
Truck Mounted Work Light Maintenance That Takes Five Minutes
Good lamps need very little care. Even so, a quick monthly check keeps them performing:
- Wipe the lens with a soft cloth and mild soap, since road film can quietly steal a big chunk of output.
- Check the mounting bolts. Over time, vibration loosens hardware, and a loose lamp eventually cracks its bracket or chafes its wire.
- Look at the connector for green corrosion, then clean it and add dielectric grease if you see any.
- Inspect for moisture or fogging inside the lens. Persistent fog usually means a failed seal or vent.
- Check the wire loom at every bend and pass through, because chafe damage gets worse fast.
- Test the circuit with the engine off and running. Flicker at idle often points to a weak ground or low voltage at the lamp.
A Simple Spec Sheet Checklist
When I evaluate a truck mounted work light for a fleet, I look for these items on the spec sheet. If they’re missing, I keep looking.
- Effective lumen rating, stated clearly as effective
- Beam diagram or lux values at a stated distance
- Voltage range covering at least 9 to 32 volts, so it handles 12 and 24 volt systems and voltage swings
- Current draw in amps at 12 volts
- IP67 and IP69K ratings together
- EMI compliance stated, ideally referencing SAE J1113 or CISPR 25
- Operating temperature range
- Housing material and mounting hardware material
- Connector type
- Warranty length, and whether the company actually honors it
In short, spend your money on the lamp that answers all ten. Then spend the rest of your attention on the wiring.
Frequently Asked Questions
How bright should a truck mounted work light be for a service van?
For most vans, a pair of rear lamps between 1,000 and 2,500 effective lumens each covers the cargo and staging area well. Always compare effective lumens rather than raw. Heavy Duty Trucking’s article on lumen ratings offers a clear explanation.
What’s the difference between raw lumens and effective lumens?
Raw lumens are calculated from the LED chips’ maximum ratings. Effective lumens, however, are measured from the working lamp after heat, optics, and assembly losses. J.W. Speaker’s guide to raw versus effective lumens walks through a sample calculation.
Do I need IP69K or is IP67 enough?
If the truck gets pressure washed, choose a lamp rated both IP67 and IP69K. IP67 covers immersion, whereas IP69K covers high pressure hot water spray. See HELLA’s breakdown of IP67, IP68, and IP69K and this IP67 versus IP69K comparison from Agri Lighting.
Does a truck mounted work light need a relay?
Yes, in nearly every vehicle installation. The relay carries the load current, while the switch only handles the trigger signal. NAPA’s guide to wiring a light bar covers relay and fuse basics.
What size wire should I use for rear work lights?
That depends on total current and run length. For long runs to the rear of a cargo van, 12 AWG is a common, safe choice to limit voltage drop. Also, Off Road Canada’s wiring guide on relays, fuses, and wire size has a useful planning table.
Why does my radio get static when my work lights are on?
Many LED drivers produce electromagnetic interference. To avoid it, choose lamps tested for EMI and make sure grounds are solid. J.W. Speaker’s overview of EMI types explains how lighting is tested.
Where should work lights go on a service van?
Mount them at the rear for the cargo opening, on the sides for compartment access, on the roof for wide area coverage, and low on the body for footing. Dun Bri’s guide on where to install work lamps on commercial vehicles compares each position.
Will a truck mounted work light drain my van battery?
It can, especially if the crew runs it with the engine off for long periods. A low voltage disconnect or an auxiliary battery protects the starting battery.
References
- The Facts About Lumen Ratings, Heavy Duty Trucking
- Raw Lumens vs. Effective Lumens, J.W. Speaker
- Four Types of EMI Issues OEMs Should Know About, J.W. Speaker
- IP69K vs IP67 vs IP68: What the Ratings Actually Mean, HELLA
- IP67 vs IP69K Work Lights, Agri Lighting
- IP69K Rating Explained: Choosing Washdown Rated Equipment, Fabrico
- How to Wire a Light Bar in 4 Easy Steps, NAPA Know How
- Off Road Light Wiring Explained: Relays, Fuses, Switches and Wire Size, Off Road Canada
- Testing for EMC/RFI Emissions of LED Navigation Lights, Defense Technical Information Center
- SAE J1113 Electromagnetic Testing for Vehicle Components, The EMC Shop
- Where Should Work Lamps Be Installed on Commercial Vehicles, Dun Bri Group
- Weather Guard Introduces Van Shelf Lighting with PowerSync Technology, Work Truck Online
- Work Lamp Preparation Kit Fact Sheet, Volvo Trucks
- Exterior Work Lights for Trucks and Vans: What Professionals Need to Know, Strobes N’ More