
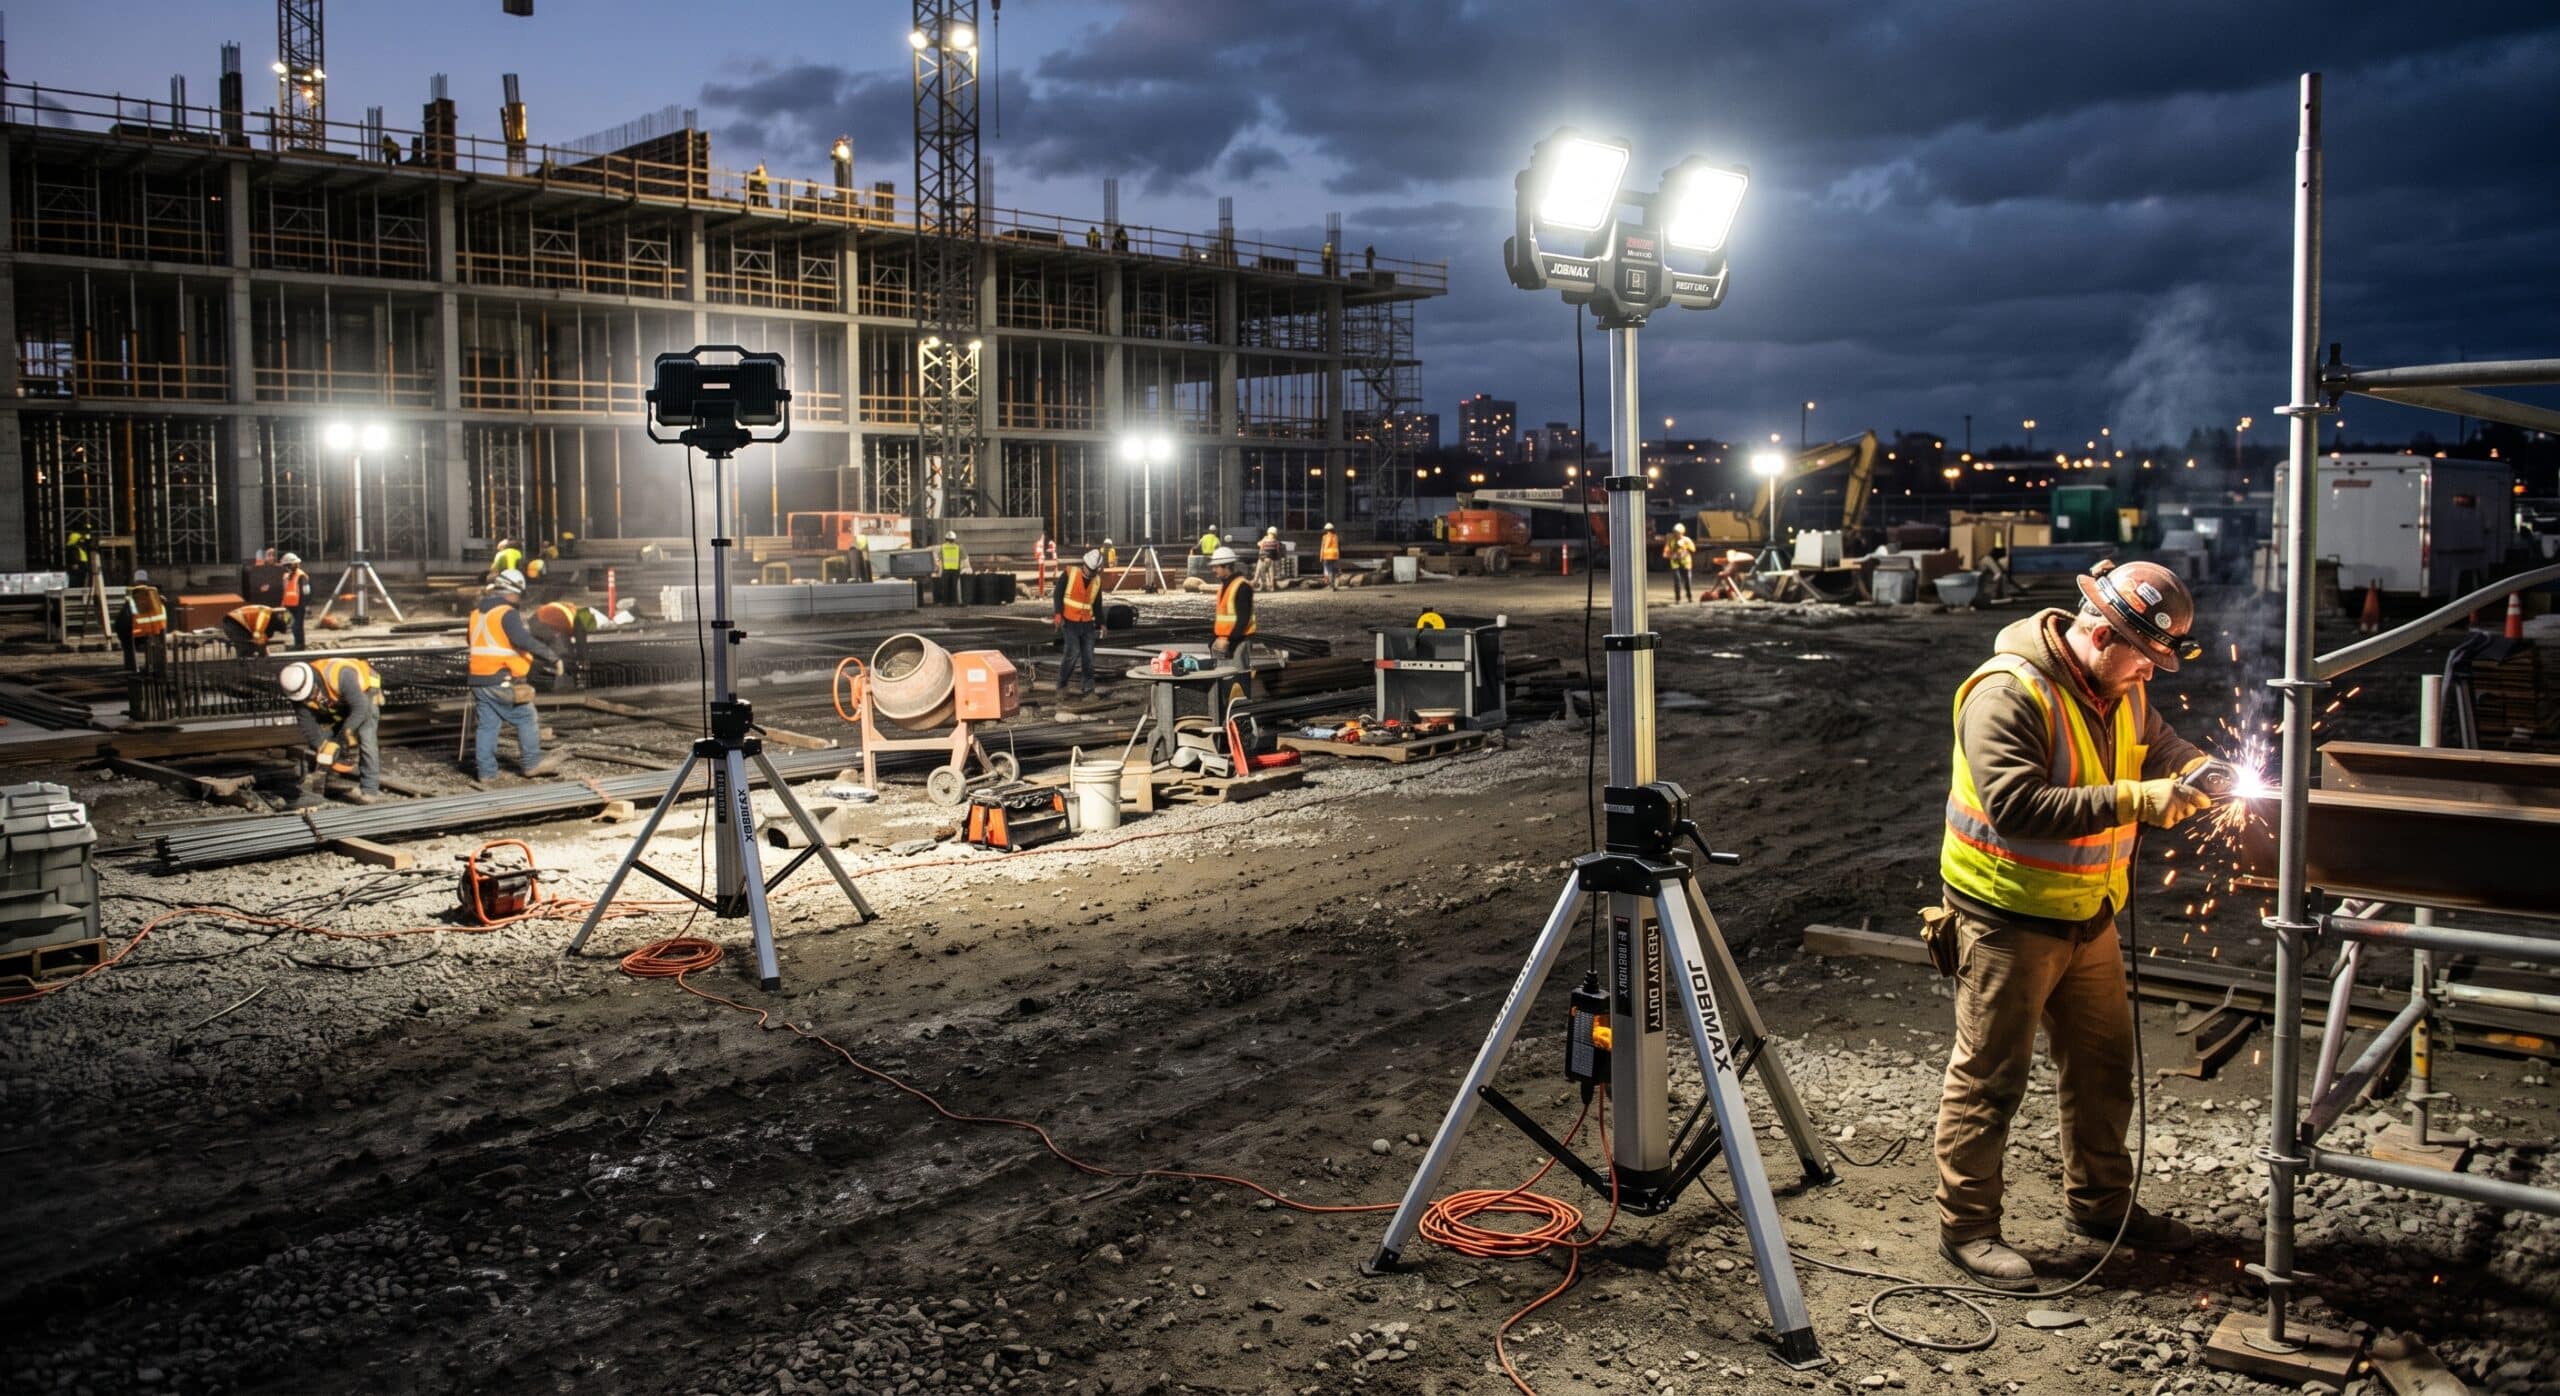
I have run enough job sites to lose count, and if there is one piece of equipment that gets fought over more than the good wheelbarrow, it is the tripod work light. Everybody wants it pointed at their section. Everybody complains when it is not bright enough. They complain when the battery dies at 3 p.m. in December, or when the wind knocks it over into the mud during a Tuesday inspection.
So when someone on my crew asks what tripod work light they should buy, I do not send them a spec sheet. I tell them what I have actually used. I tell them what breaks, and what keeps working after two years of getting thrown in the back of a truck.
This guide is written from that seat. I am not a lighting engineer and I do not sell tools. I am a site superintendent who has to keep a crew productive and safe from before sunrise until after sunset. A tripod work light is one of the few pieces of gear that touches almost every trade on a large job. Framers need it for early morning layout. Electricians need it in a mechanical room with no windows, though once they’re actually inside a panel or a wall cavity a tripod stops being the right tool — that’s its own topic, covered in our guide to the best work lights for electricians in tight spaces. Inspectors need it to see what they are signing off on. Get the lighting wrong and you slow everyone down. You also open yourself up to a safety citation you did not need.
Why Tripod Work Lights Matter More Than People Think
Lighting Becomes Part of the Schedule
On a small residential remodel, you can get away with a single clamp light and a headlamp. On a large commercial or multifamily job, lighting becomes part of the schedule. Framing crews start before sunrise for six months of the year. MEP rough in happens in windowless shafts and basements regardless of the hour. Punch list walks in December happen with maybe seven hours of usable daylight. If your lighting plan is an afterthought, you are going to eat delays. You will also see rework from mistakes nobody could actually see. Worse, there is a real risk of someone getting hurt because they could not spot a trip hazard or an open floor penetration.
A Tripod Beats a Handheld or a Clamp Light
That is where a tripod work light earns its keep. A tripod gets the light source up off the ground, above head height. That spreads the beam across a wider area. It also cuts down on the harsh shadows that a low mounted light throws across scaffolding, rebar, and tool cords. It is also adjustable on the fly. A carpenter can swing the head and raise the legs on uneven ground. The whole light can be repositioned in under a minute without needing an extra set of hands. Nobody’s arguing for going back to a corded halogen shop light either — we get into exactly why LED won that fight in LED work light vs halogen, but the short version is heat, weight, and bulb life all favor LED on a tripod specifically.
The OSHA Compliance Angle
There is also a compliance angle superintendents cannot ignore. OSHA sets minimum illumination levels for construction work under 29 CFR 1926.56, and the numbers are not generous. General construction areas, concrete placement, excavation, and active storage areas must hit at least 3 to 5 foot candles while work is in progress. General construction plants and shops need 10 foot candles. First aid stations and offices need 30. Those numbers read low compared to what a bright LED tripod work light can put out. But the point is that OSHA treats lighting as a documented safety requirement, not a courtesy. When an inspector walks a dark stairwell or an unlit mechanical room, that is a citation waiting to happen. It is a cheap one to avoid.
What Actually Matters When You Are Buying One
I have gone through more of these than I care to admit. Most of them fail in the same three or four ways. Here is what I actually look at before I approve a purchase order.
Lumen output, and matching it to the space
Lumens tell you total light output. The number by itself does not tell you whether a light will actually work for your application. A small flood light putting out 400 to 1,000 lumens is fine for close detail work, like a punch list item or a small utility closet. For an open bay or a section of an active job site, you want a tripod work light in the 3,000 to 12,000 lumen range. For whole area coverage on a large site, tower style lights climb up toward 15,000 to 20,000 lumens. The mistake I see most often is a foreman buying a light rated for a garage. Then he tries to light up a half acre pour with it. Match the tool to the area, not the price tag.
IP rating, because job sites are not clean rooms
An IP rating tells you how well sealed a light is against dust and water. Anything below IP54 does not belong on an active job site. I want IP65 at minimum for general use. I want IP67 if the light is going anywhere near a slab pour or an exterior job in the rain. The same goes for a site where pressure washing happens nearby. The DEWALT DCL079B, for example, carries an IP55 rating. That is fine for typical interior and covered exterior use, but it is not the light I would leave sitting in standing water overnight. Milwaukee’s tower style lights push up to IP67 and are rated fully submersible to about a meter. That matters a lot more than people expect once monsoon season hits.
Corded, battery, or hybrid power
This decision comes down to how your site is set up. If you already have generator power and GFCI distribution running to every level, go corded. It gives you unlimited runtime and usually a brighter output for the price. If your crew is still roughing in electrical, go battery powered — we cover what separates a good option there in our guide to the rechargeable work light for contractors. A tripod work light on the same platform as your drills and saws means one less thing to plan around. A lot of manufacturers now build hybrid units that run on battery and also plug into AC power. That is the option I push people toward these days, because it covers both situations without buying two different lights.
A few newer tower lights also add Bluetooth dimming and app control, and we’ve put a handful of those smart LED work lights compared side by side. On a job site, though, I still weigh physical durability well above the app layer.
Color temperature
Most job site lights land around 5000K, which reads as a clean, neutral white close to daylight. That is the number I tell crews to look for. It makes it easier to judge true colors on paint, drywall mud, and finish materials. It is also less fatiguing over a ten hour shift than a bluer 6500K light. A warmer 3000K light looks cozy in a showroom. It is the wrong choice for a job site, though. Someone still needs to spot a hairline crack in concrete, or read a tape measure at four in the afternoon in January.
Tripod height, stability, and mounting head
Look for a tripod that extends to at least six feet, and ideally closer to seven. That clears scaffolding, stacked material, and people’s heads. Check how wide the legs spread and what the footprint looks like on uneven ground. A narrow base on soft dirt or gravel is a problem waiting to happen. It is how you end up with a $200 light face down in the mud after the first gust of wind. The head should rotate and tilt independently of the tripod, so your crew can aim it without repositioning the whole stand. A multi directional or 360 degree swivel head is worth paying extra for on a large site where the light gets repositioned several times a shift.
Build quality and how it survives being a job site tool
A work light on a big project gets dropped, run over, and left out overnight. Someone will use it as a step stool at some point whether you like it or not. Metal or reinforced polymer housings hold up far better than the bargain bin plastic units that crack the first time they tip over. Check whether replacement lenses, batteries, or bulbs are available separately. A light you cannot repair is a light you are throwing away after one hard season.
What I Actually Run on a Large Site
I am not going to pretend there is one perfect light for every job, because there is not. What I do is keep a mix of three types on hand.
General area coverage
For general area coverage across a large open floor or a slab pour, I like a battery platform tower light in the 2,500 to 3,000 lumen range. It should match whatever cordless tool system the crew already runs, so the batteries are interchangeable. Milwaukee’s M18 Rocket tower light is a common one on my sites for exactly that reason. The same batteries that run our saws and drills drop straight into the light. DEWALT’s 20V tripod work light kit is another one I see a lot on 20V MAX platforms. It runs around 3,000 lumens with a folding tripod that a single person can set up in under a minute.
Rough-in work in mechanical rooms and stairwells
For rough in work inside mechanical rooms and stairwells, a smaller tower or stick light is usually plenty. Look for one in the 1,500 to 2,500 lumen range on the same battery platform. It is easier for one trade to carry around without needing a second person, and for a lot of that work a magnetic mount light clipped to a duct or stud does the job better than a full tripod anyway.
Long duration exterior use
For long duration exterior use, like a night pour or extended punch list work after daylight savings ends, I lean toward a corded or hybrid unit. It can run off generator power indefinitely. Nobody has to stop and swap batteries in the middle of a finish. On a site with no power run yet at all, a few of our subs have started leaning on solar rechargeable work lights as a stopgap between visits, though I still treat that as a backup rather than a primary light source.
Whatever brand you land on, buy at least two or three of the same model. That lets your crew standardize chargers, batteries, and mounting accessories. Mixing five different brands across a site sounds flexible in theory. In practice it just means nobody can find a charger that fits when they need one.
Buying versus renting
On a job that runs six months or longer, I almost always buy. The lights pay for themselves in saved labor hours within the first few weeks. Owning the gear also means it is available the moment you need it, instead of waiting on a rental counter. Renting from a local tool supplier can make more sense for a short duration project. The same goes for a job where you genuinely do not know if you will need heavy lighting again for a year. Just check the rental unit’s condition before it leaves the counter. A scratched lens or a tripod leg that will not lock is not something you want to discover at six in the morning. That is especially true an hour from the nearest rental return.
Setting Lights Up So They Actually Help
Buying the right light is half the job. Where you put it matters just as much, and this is the part that gets skipped on busy sites.
Spread the light instead of clustering it
Spread your lights out instead of clustering them in one spot. A single bright tower light in the center of a room creates a hot zone in the middle and deep shadows along the walls. That is exactly where people trip on debris or step into an open trench. Two or three moderate lights positioned around the perimeter of a work area give you more even coverage. You get fewer hard shadows than with one giant light in the middle.
Watch your angle and your cords
Angle the head down and slightly across the work area rather than straight at eye level. Glare off a light aimed directly at someone walking toward it is worse than no light at all. It is a common complaint I hear from subs working near the entrance of a lit area.
Keep cords and battery packs off the walking path. This sounds obvious, but on a fast moving site it is one of the most common near misses I write up. Run cords along a wall or overhead where possible. If a cord has to cross a path, use a cord cover. Or route it through a doorway threshold instead of leaving it flat across foot traffic.
Check footing and use GFCI protection
Check your tripod footing every time you move it. Concrete slabs are forgiving. Gravel, mud, and uneven subgrade are not. A light that tips over mid shift is both a hazard and a light that is now out of service until someone checks it for damage.
If you are running lights outdoors or anywhere near water, always run them through a GFCI protected circuit. That can be a portable GFCI box, a temporary power spider box, or a built in GFCI outlet on a generator. This is not optional, and it is one of the first things an OSHA inspector checks on a walk through.
Mistakes I See Constantly
Buying cheap and under lighting the space
The most common mistake is buying the cheapest option available, then being surprised when the housing cracks after a month. A job site light is a consumable in the sense that it takes abuse daily. But the internals, like the LED driver and battery contacts, should last several years. That happens if you spend a reasonable amount up front.
The second mistake is under lighting large spaces because a foreman assumes one light will cover an area it clearly cannot. Walk the space at the time of day the work actually happens, not at noon. Judge whether you can read a tape measure and spot a trip hazard from every corner.
Ignoring battery management and seasonal shifts
The third mistake is ignoring battery management on a big crew. If you have fifteen guys pulling from the same set of batteries for tools and lights, someone will end up with a dead one. It usually happens at six in the morning. Dedicate a charging station specifically for light batteries, separate from the tool batteries. That way lighting is never the thing that goes down because someone forgot to swap a pack the night before.
The fourth mistake catches even experienced superintendents off guard. It is forgetting lighting entirely when the project schedule shifts into shorter winter days. A framing crew that started in July working full daylight hours can suddenly find themselves starting and finishing in the dark by November. Build a seasonal check into your site walk routine. That way lighting gets added before the complaints start, not after someone gets hurt because a stair run went unlit for two weeks.
Keeping Them Running
A tripod work light is cheap insurance against wasted labor hours, but only if it actually works when someone reaches for it. Wipe lenses down regularly, since dust and drywall mud cut light output more than people realize. Store batteries at a reasonable temperature instead of leaving them in a truck bed through a heat wave or a hard freeze. Extreme temperatures shorten battery life fast. Inspect tripod legs and locking mechanisms every few weeks. A leg that no longer locks is how a light ends up on the ground. Keep a couple of spare units on hand for a large crew. Losing your only good light on a Friday afternoon, with an inspection Monday morning, is not a position you want to be in.
Frequently Asked Questions
How many lumens do I need for a large job site?
For general area coverage on an open floor or exterior work area, look for a tripod work light in the 3,000 to 12,000 lumen range. Consider a tower style unit closer to 15,000 to 20,000 lumens for whole site coverage. Smaller detail or punch list work can get by with 1,000 to 2,000 lumens. Pro Tool Reviews’ buying guide breaks this down further by application: Best LED Work Light Buying Guide.
What minimum lighting level does OSHA actually require?
Under 29 CFR 1926.56, general construction areas, excavation, and active storage areas need at least 3 to 5 foot candles while work is happening. General construction plants and shops need 10 foot candles. First aid stations and offices need 30 foot candles. You can read the full standard directly from OSHA here: 1926.56 Illumination.
Are battery powered tripod lights bright enough for a whole crew, or do I need corded?
Battery platforms have closed most of the gap with corded lights in recent years. Several cordless tower lights now put out 2,500 to 3,000 lumens on a single charge. That is plenty for most rough in and general work. For all night pours or long duration exterior lighting, where you cannot stop to swap batteries, a corded or hybrid unit is still the safer call.
What IP rating should a job site light have?
IP65 is a reasonable minimum for general job site use. IP67 is worth paying for if the light will be near standing water, exterior slab work, or pressure washing. Anything under IP54 is really only suited for a clean, covered interior space.
Do tripod lights need to be on a GFCI circuit?
Yes. Any corded work light used outdoors or in a wet location needs to run through GFCI protection. That can be a spider box, a portable GFCI unit, or a generator with a built in GFCI outlet. This is standard practice and something inspectors check for directly.
How tall should the tripod extend?
Look for a tripod that reaches at least six feet, and ideally closer to seven feet. That height clears scaffolding, stacked material, and foot traffic. A taller mounting height also spreads the beam over a wider area. It reduces harsh shadows compared to a light left low to the ground.
References
Occupational Safety and Health Administration. “1926.56, Illumination.” osha.gov/laws-regs/regulations/standardnumber/1926/1926.56
Pro Tool Reviews. “Best LED Work Light Buying Guide, Who Needs Halogen?” protoolreviews.com/best-led-work-light-buying-guide-who-needs-halogen
Pro Tool Reviews. “DeWalt 20V Tripod Light DCL079 Review.” protoolreviews.com/dewalt-20v-tripod-light-dcl079-review
ToolGuyd. “New Milwaukee M18 LED Tripod Worklight and Other New M12 and M18 LED Lighting Products.” toolguyd.com/milwaukee-m18-led-tripod-worklight-other-m12-m18-led-lighting
Bob Vila. “The Best Work Lights for the Workshop or Jobsite, Tested.” bobvila.com/articles/best-work-light
DEWALT. “20V MAX Cordless Tripod Light (Light Only), DCL079B.” dewalt.com/en-us/product/dcl079b
Milwaukee Tool. “Jobsite Flood, Tower and Handheld Lighting.” milwaukeetool.com/products/lighting