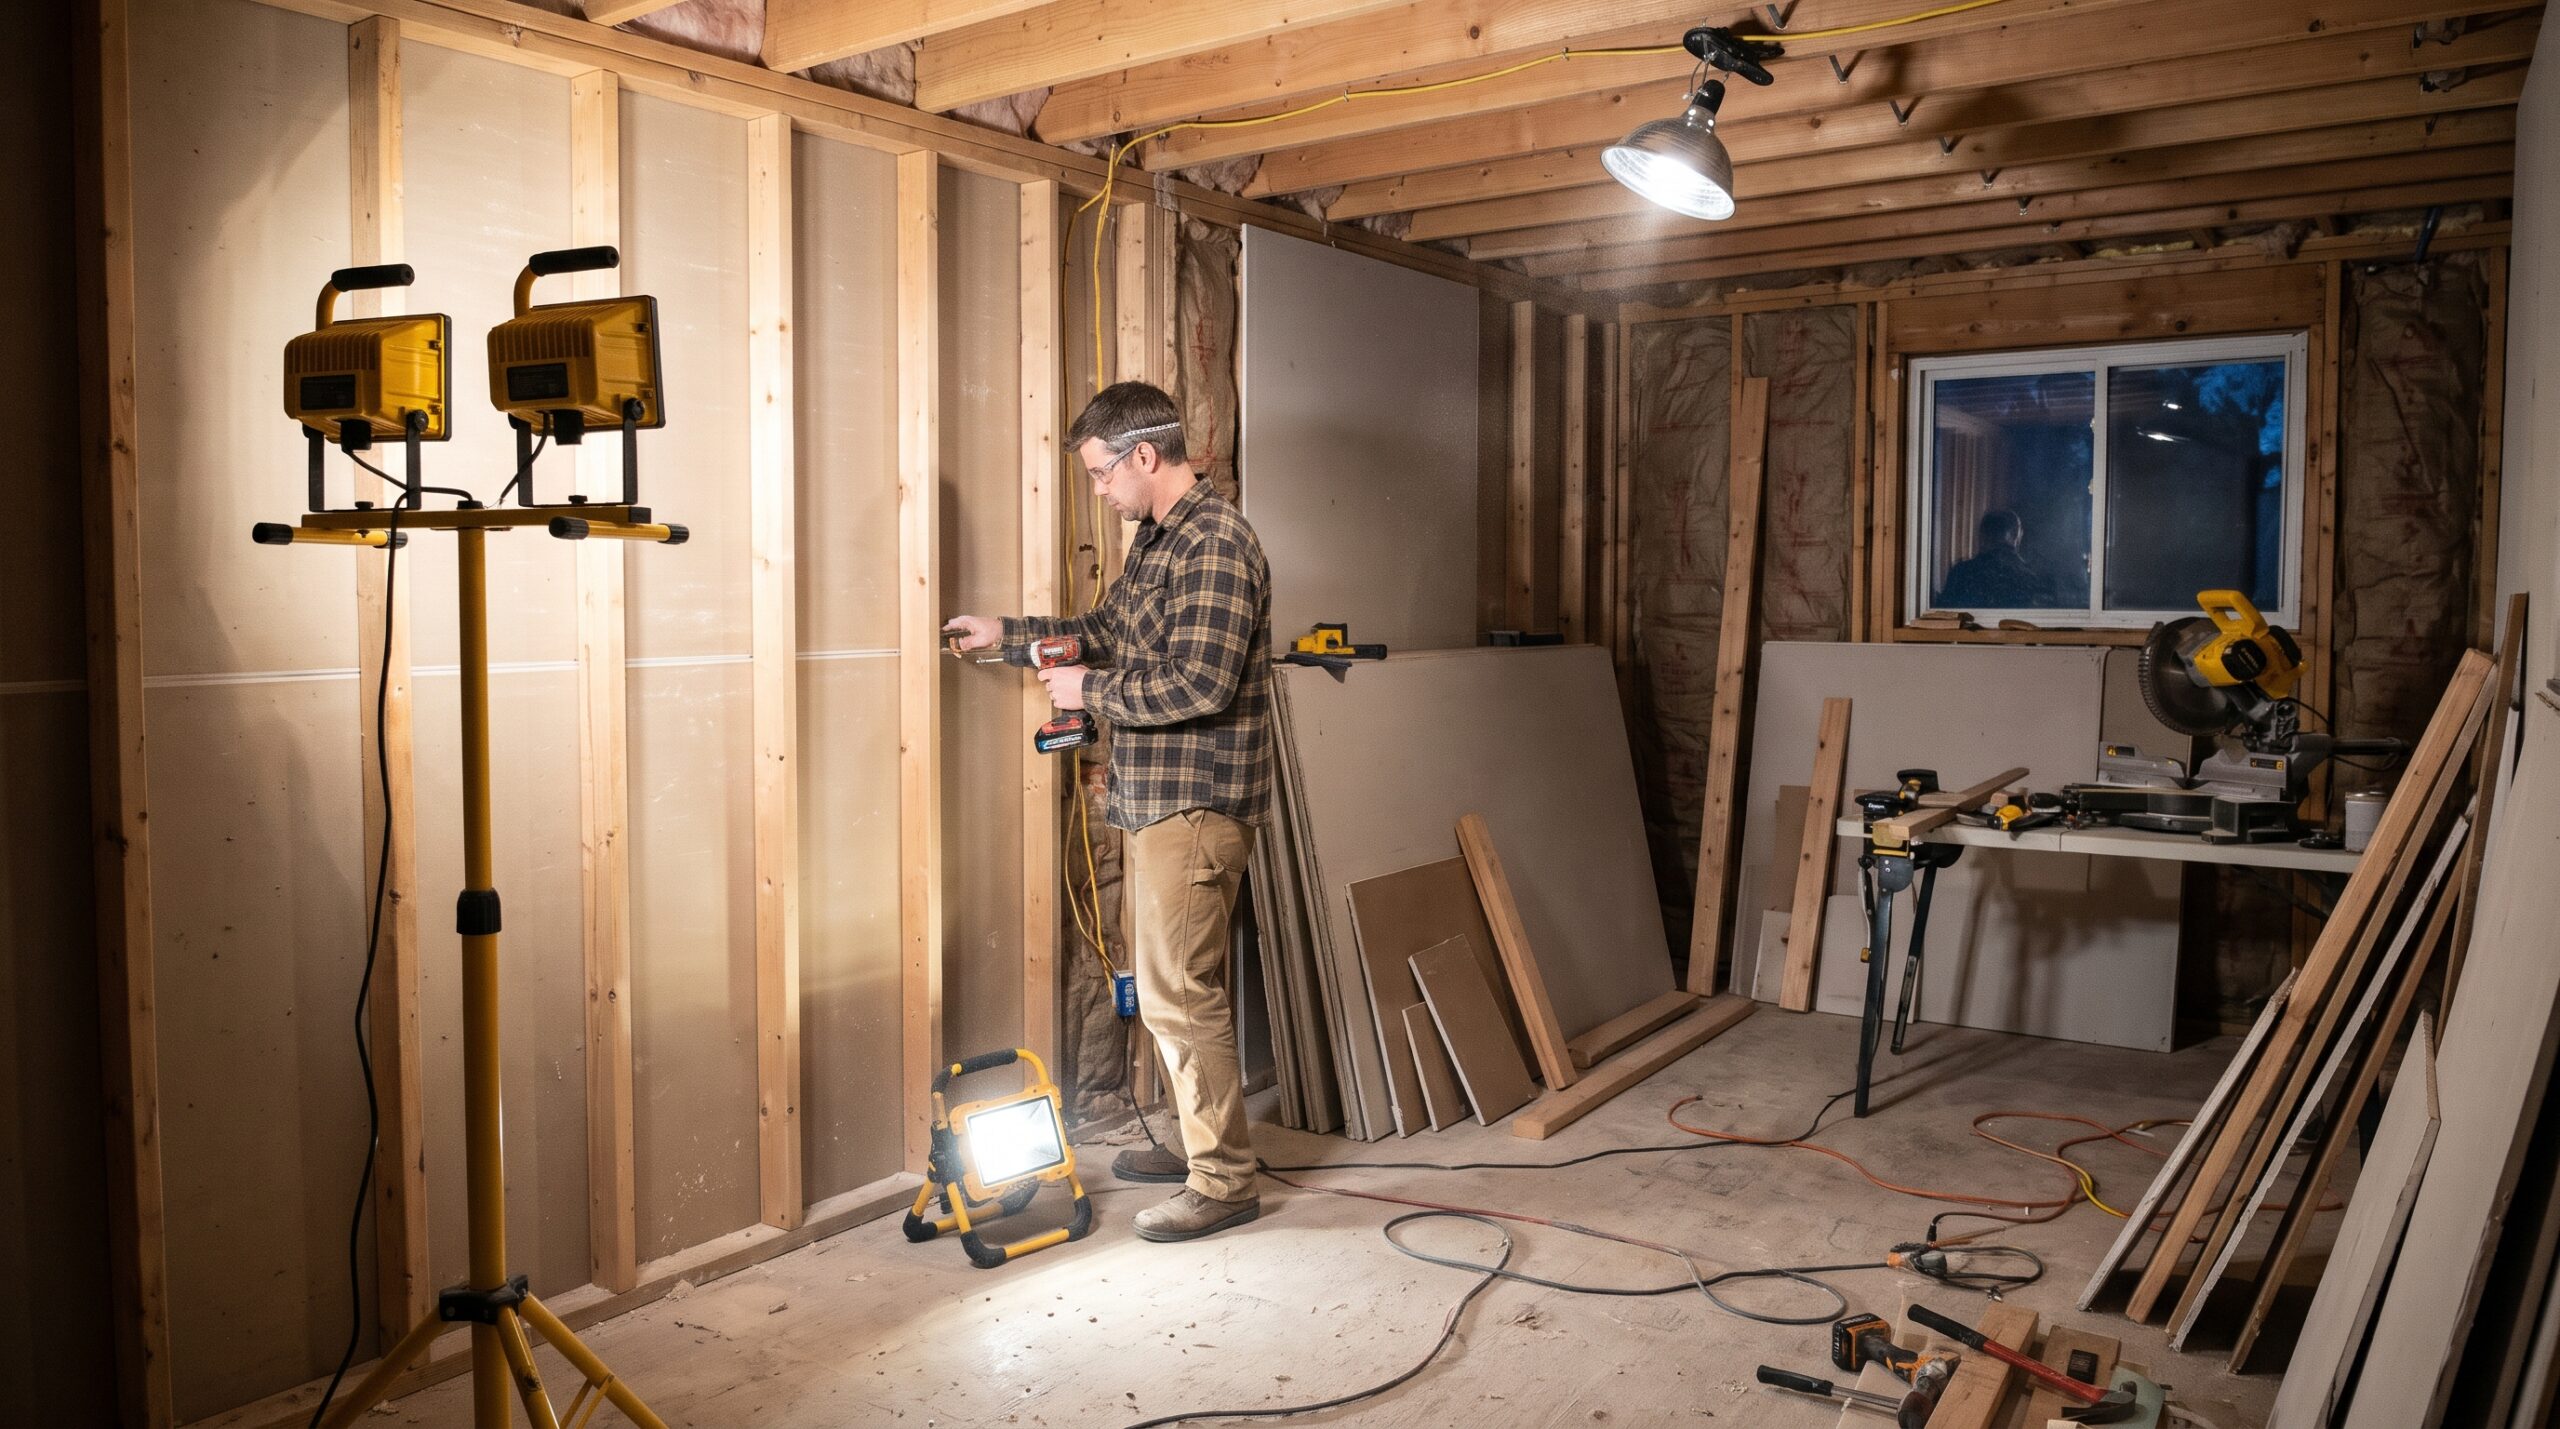
Lighting a DIY Home Renovation: Which Work Lights Fit Each Stage
I have been pulling wire for a little over twenty years, the last twelve as a master electrician. Most of that time has been spent in other people’s houses: kitchens taken down to the studs, basements turned into apartments, and bathrooms where somebody’s weekend project went sideways. One thing shows up on almost every job I’m called into after a homeowner started it themselves. The work was done under poor DIY renovation lighting.
That doesn’t mean they worked in the dark. People usually have plenty of light. It’s just the wrong light, in the wrong place, at the wrong stage. A single halogen on a stand in the middle of the room. A ceiling fixture dangling from its wires while somebody tapes drywall underneath it. A phone flashlight held in your teeth while you try to read a wire color inside a junction box.
Good DIY renovation lighting isn’t about buying the brightest thing on the shelf. A renovation moves through stages, and each stage asks something different of your eyes. What works for demolition is close to useless for paint, and what works for paint will drive you crazy when you’re tracing a cable through a wall cavity. Below is how I set up light on my own jobs, stage by stage, plus the electrical side most guides skip: how to power all of it without tripping breakers or starting a fire.
Start With the Numbers: How Bright DIY Renovation Lighting Needs to Be
Before we talk about gear, you need to know what you’re measuring. Light output on the box is listed in lumens. What your eyes care about is how much of that light lands on the surface you’re working on, measured in foot candles. One foot candle is one lumen spread over one square foot.
Why the OSHA Table Is Only a Floor for DIY Renovation Lighting
For a long time, the federal reference point for construction sites has been OSHA’s illumination table. It calls for 5 foot candles of general construction area lighting, 10 foot candles in plants and shops such as carpenter shops and mechanical and electrical equipment rooms, and 30 foot candles in first aid stations and offices. You should know that OSHA proposed in 2025 to rescind those construction illumination requirements, codified in 29 CFR 1926.26 and 1926.56, and that trade groups pushed back. Whatever the final outcome, OSHA rules apply to employers, not to a homeowner working on their own house.
So why bring it up? Because those numbers are a floor, not a target. Five foot candles is enough to walk through a room without tripping over a bucket. It isn’t enough to see a hairline crack in tape or a nick in a conductor’s insulation. Even safety consultants point out that detailed inspection work is usually lit at 50 to 100 foot candles, and very fine bench work at 100 or more.
Quick DIY Renovation Lighting Math for a Typical Room
Here’s the quick math I teach apprentices. Take a 12 by 14 foot bedroom: 168 square feet. If you want around 50 foot candles across the floor for general work, you need roughly 8,400 lumens actually landing on that floor. Light gets lost to walls, dust, distance, and bad aiming, so I plan on 12,000 to 15,000 lumens from the fixtures. That’s a lot more than most people expect, and it’s why one work light in the middle of the room always disappoints.
One cheap tip: phone light meter apps aren’t lab grade, but they’re good enough to tell you whether a corner reads 8 foot candles or 60. Check your DIY renovation lighting setup once before you start finishing work. You’ll be surprised how dark some spots are.
Stage One: DIY Renovation Lighting for the Walkthrough and Demolition
What you need to see: Hazards. Hidden wiring, plumbing, nails, the edge of the floor where the subfloor ends.
The light that fits: A bright headlamp, plus one or two battery powered area lights that don’t depend on the house’s circuits.
Demolition is the stage where I see the most risk, because it’s usually when the existing lights stop working. Somebody pulls a ceiling fixture, kills the circuit at the panel, or tears out a wall with a switch leg running through it. The room goes dark at exactly the moment you’re holding a reciprocating saw.
Keep Your Light Off the Circuit You’re Shutting Down
The rule on my jobs is simple. Never light a demolition zone from a circuit that feeds the area you’re demolishing. Kill the breakers for the room, confirm the circuit is dead at the outlets and switches with a noncontact voltage tester, then run your temporary light from a circuit in another part of the house or from a battery platform.
Cordless area lights that share batteries with your drill or saw are worth every penny here. Set them on the floor pointing up at the ceiling, and you’ll get a soft, even bounce that fills the room without blinding glare. Wear a headlamp with at least 300 lumens and a wide flood setting so your hands stay free. When you open a wall cavity, the headlamp follows your eyes into it.
Skip the old halogen tripod lights during demo. They run very hot, the bulbs shatter when knocked, and demolition creates a lot of dust and loose insulation. A hot lens next to a pile of shredded paper facing is not a combination I want in a house.
Stage Two: DIY Renovation Lighting for Framing and Structural Work
What you need to see: Layout lines, square, level, and plumb across the whole room.
The light that fits: Tripod mounted LED floods, ideally a twin head unit, set high and aimed across the work.
Framing is where you finally want raw brightness and wide coverage. You’re snapping chalk lines across a floor, reading a level bubble from six feet away, and checking whether a header sits flush. A twin head LED tripod in the 8,000 to 10,000 lumen range, set at full height in a corner, covers most rooms well. For larger spaces, like an open basement, two tripods in opposite corners kill the shadows that one light throws behind you.
Height matters more than people think. A light sitting at waist level throws your shadow right across the work every time you turn around. Push the tripod as high as it will go and tilt the heads down at about 45 degrees. If the room has open joists overhead, a linkable LED string light stapled or hooked along the framing gives you great overhead fill. Just don’t staple through the cord itself.
Stage Three: Rough Electrical and Plumbing
What you need to see: Detail inside tight, dark cavities. Wire colors, gauge markings on cable jackets, fitting threads, the back of a box.
The light that fits: A magnetic or clip mount compact light, a headlamp, and a high CRI handheld.
This stage is my world, so I’ll be specific. When I’m roughing in a kitchen, I’m reading tiny printing on NM cable jackets to confirm 12 gauge versus 14 gauge. I’m checking whether a red conductor is really red or a faded orange. I’m looking at the back of a box for a knocked out tab that left a sharp edge. All of that needs focused light from close range, not a floodlight from across the room.
A compact LED with a strong magnet base is my most used tool at this stage. It sticks to a steel stud, a metal box, or the panel cover, and points right into the work. Clip lights do the same job on wood framing.
Why Color Rendering Matters in DIY Renovation Lighting
This is also where color rendering starts to matter. CRI, the Color Rendering Index, measures how faithfully a light shows colors compared with a reference source. A CRI of 80 is considered standard for living and working spaces, while 90 or above suits professional work where color accuracy matters. Cheap LEDs often sit in the low 70s, and under that light, white and gray conductors look nearly identical, as do red and orange. On a 240 volt circuit or a three way switch loop, misreading a wire color is how people get hurt or end up with a fixture that never works right.
Plumbers face the same issue in reverse: they need to see whether a PEX crimp ring is seated or whether a solder joint flowed all the way around. A focused handheld with a narrow beam gets into a cavity better than any area light.
Keep a Pocket Light Within Reach
One more point from experience. Keep a small light in your pocket at all times during rough in. You’ll drop a wire nut or a screw into a wall cavity at least once a day, and finding it in thirty seconds instead of ten minutes adds up over a project.
Stage Four: Insulation and Drywall Hanging
What you need to see: Stud locations behind the sheet, cutouts for boxes, full coverage of insulation.
The light that fits: Overhead area light with good spread, plus a headlamp.
Once insulation goes in, the room changes. Fiberglass and mineral wool batts swallow light, and the room suddenly looks darker even with the same fixtures running. Move your tripod lights closer to the work and keep them pointed at the wall you’re covering.
When hanging sheets, you’re mostly making sure screws hit framing and box cutouts line up. A headlamp helps when marking box locations, especially if you use the trick of rubbing chalk or lipstick on the box edges and pressing the sheet against them. Keep your lights away from loose insulation, and never lay a work light directly on a batt. Even LEDs build up heat at the driver, and insulation is designed to trap heat.
Stage Five: DIY Renovation Lighting for Drywall Finishing
What you need to see: Every ridge, tool mark, crater, and bulge in the joint compound.
The light that fits: A raking light: a bright, slim light held almost parallel to the wall.
If there’s one stage where the right light completely changes the result, it’s this one. Ceiling lights and room floods are forgiving. They hit the wall straight on and flatten everything out, so the mudded seams look perfect. Then you roll on a coat of eggshell or satin paint, the afternoon sun comes through the window, and every flaw shows up like a road map.
The fix is raking light: shining a light parallel to the wall, or at a very shallow angle, so it casts long shadows across even the smallest ridges, tool marks, and craters. Professional finishers use dedicated inspection lights for this, and there’s a reason for the slim shape. The long, narrow body is built to sit close to the surface, where defects show up best.
How to Use a Raking Light on Your Seams
You don’t need to spend big. A long LED light bar, or even a regular handheld held flat against the wall and pointed along it, works far better than a floodlight from across the room. Pass it slowly across each seam after every coat. Circle problem spots with a pencil, sand, and check again. I tell homeowners this is the cheapest quality control in all of DIY renovation lighting. Fixing a ridge during sanding takes two minutes. Fixing it after paint means sanding, priming, and repainting the wall.
Turn off the overhead floods while you rake. Flat fill light fights your raking light and washes out the shadows you’re trying to see.
Stage Six: Painting and Color Work
What you need to see: True color, even coverage, missed spots, and holidays in the paint film.
The light that fits: High CRI area lights at a neutral color temperature, ideally similar to the light the room will have when finished.
Painting is where homeowners usually discover their work lights were lying to them. The paint looked perfect at night under the tripod, and in morning daylight it’s streaky, or the color looks nothing like the chip.
Getting CRI and Color Temperature Right in DIY Renovation Lighting
Two numbers matter. First, CRI: aim for 90 or higher for any color work. Second, color temperature, measured in Kelvin. Warm light around 2700K makes cool colors look muddy. Very cool light around 6500K exaggerates blues and flattens warm tones. For general painting, I like work lights in the 4000K to 5000K range, which is neutral enough to show coverage honestly. Before you commit to a color, check your test swatches under the bulbs you’ll actually install in that room. That’s the light you’ll live with.
Checking Coverage Before the Paint Dries
Coverage is a separate problem from color. To catch thin spots, hold a light at a low angle across the freshly rolled wall, the same raking idea as drywall, and look for areas where the sheen changes. Do this while the paint is still wet enough to back roll.
Stage Seven: DIY Renovation Lighting for Flooring and Tile
What you need to see: Lippage between tiles, gaps, flatness, grout lines, and debris under the floor before it goes down.
The light that fits: Low mounted floods aimed across the floor, plus a handheld for close checks.
Flooring flips the lighting problem on its side. You’re working on the horizontal plane, so your area lights should sit low, close to the floor, and point across it rather than down onto it. A tripod light lowered to its shortest setting, or a cordless area light set on the floor in a corner, throws light across the surface. Any tile edge sitting higher than its neighbor will cast a small shadow you’d never see from overhead.
Before you lay any flooring, sweep and then scan the subfloor with that low light. A single drywall screw or chunk of dried mud under vinyl plank or tile becomes a permanent bump, and low angle light finds them.
Wet saws and tile cutting bring water into the picture, which raises the stakes on the electrical side. Use lights with a real ingress rating (IP65 or better handles splashes and dust), and make sure everything plugs into GFCI protection. More on that below.
Stage Eight: Trim, Cabinets, and Finish Electrical
What you need to see: Tight miters, caulk lines, reveals, hinge alignment, and inside cabinet boxes.
The light that fits: Small, flexible task lights: gooseneck clips, magnetic pucks, and a quality headlamp.
At this point the room is nearly done and you’re making small, precise moves. Big floods create harsh glare off new paint and glossy cabinet faces. Switch to smaller, softer sources pointed right at the work. A gooseneck clip light on a cabinet frame lets you see inside while you set hinges or run under cabinet wiring.
For finish electrical, such as installing devices, trim plates, and fixtures, the headlamp and high CRI handheld come back out. You’re making terminations in boxes that are now surrounded by painted drywall, and the cavity behind is darker than ever. If you’re working on a live panel or on terminations, my strong advice is to stop and call a licensed electrician. I’m saying that as one of them, and also as someone who has repaired a lot of melted backstabbed receptacles installed under a phone flashlight.
Stage Nine: The Punch List
What you need to see: Everything a guest, inspector, or buyer will notice later.
The light that fits: All of it, in sequence. Ceiling lights first, then raking light on every wall, then daylight.
Walk the finished room three times. Once with the permanent fixtures on, which is how you’ll actually live in the space. Once at night with a raking light on every wall and the floor. And once during the day with the blinds open. Each pass of your DIY renovation lighting will turn up things the others missed. Painters’ tape tabs on flaws as you go, and work through them in one session.
Powering Your DIY Renovation Lighting Without Tripping Breakers or Starting a Fire
This is the part I wish every DIY guide included, because I see the failures firsthand.
Use GFCI Protection on All DIY Renovation Lighting
Renovation means water, dust, damp concrete, and damaged cords, all at the same time. On construction sites, the NEC calls for some form of GFCI protection whenever people are doing construction, demolition, or maintenance work, whether the outlet is temporary or part of the building’s permanent wiring. Your house may not count as a jobsite in the legal sense, but the physics doesn’t care. If the room you’re working in doesn’t have GFCI receptacles, use a portable GFCI cord or adapter, and press the test button every day before you start.
Size Your Cords for the Load
A long run of thin 16 gauge cord feeding a saw and a light will heat up and drop voltage. For runs over 25 feet with tools on them, I use 12 gauge outdoor rated cords. For lights alone, 14 gauge is plenty.
Respect the Circuit
A typical 15 amp, 120 volt circuit can deliver 1,800 watts, and you shouldn’t load it continuously past about 80 percent, around 1,440 watts. An old 500 watt halogen eats a third of that by itself. A modern LED delivering similar light might draw 50 to 100 watts. This is the strongest argument for LEDs over halogen: you can run several LED floods plus a miter saw on one circuit, while halogens trip the breaker the moment the saw starts.
Build Safe Cord Habits
ESFI reports roughly 3,300 home fires starting in extension cords each year, killing 50 people and injuring 270 more. Their advice lines up with what I tell every client: don’t overload extension cords or let them run through water, don’t daisy chain cords together, and don’t run them under rugs or through closed doors where they get pinched. Coil cords loosely at the end of the day and unplug lights when you leave.
Mind the Heat
Even LED work lights get warm at the driver and housing. Keep every light at least a foot from insulation, paper faced drywall, drop cloths, and open containers of solvents or stain.
A Simple DIY Renovation Lighting Kit That Covers the Whole Project
If you’re starting from nothing, here’s what I’d buy for a typical one or two room renovation:
A twin head LED tripod light, 8,000 lumens or more, for framing, drywall hanging, and general fill.
Two cordless area lights that run on the same battery platform as your tools, for demo and anywhere without power.
A headlamp with a wide flood mode and at least 300 lumens.
A magnetic compact light and a clip or gooseneck light for rough in and cabinet work.
A long, slim LED bar or inspection light for raking light during drywall finishing and painting.
At least one light rated CRI 90 or higher, in the 4000K to 5000K range, for wiring identification and color work.
A portable GFCI and properly sized outdoor rated extension cords.
That’s not a huge investment compared with what most renovations cost, and every piece earns its keep. The biggest DIY renovation lighting mistake I see is spending on one giant light and nothing else. Two or three moderate lights from different angles will always beat one huge light from one direction, because shadows come from direction, not from a lack of lumens.
Frequently Asked Questions About DIY Renovation Lighting
How many lumens does DIY renovation lighting need for one room?
Plan on about 50 to 90 lumens per square foot of floor area from your fixtures for general work, since light gets lost to walls, distance, and dust. A 150 square foot room usually needs 10,000 to 15,000 lumens spread across two or more sources. For context on minimums, see OSHA’s construction illumination table.
Are LED work lights better than halogen for home renovation?
For nearly every stage, yes. LEDs use a fraction of the power, run far cooler, and won’t shatter a hot bulb when knocked over. Halogen still has a few fans for raking light because of its warm, even spectrum, but a high CRI LED does the job without the fire risk. Bob Vila’s tested work light roundup compares current LED options.
What CRI rating should a work light have for painting and wiring?
Look for CRI 90 or higher. Lower CRI lights make similar colors blend together, which causes paint mismatches and misread wire colors. Ledlenser’s explanation of CRI covers how the scale works.
What is raking light and why do drywall finishers use it?
Raking light means holding a light almost flat against a wall so it shines along the surface. Every ridge and dip casts a shadow, which reveals flaws that flat overhead light hides. This overview of raking light tools shows how finishers use it.
Do I need GFCI protection for work lights in my own home?
Building codes and OSHA rules aimed at worksites don’t automatically apply to a homeowner, but the shock hazard is the same. Plug every tool and every piece of DIY renovation lighting into a GFCI protected outlet or a portable GFCI. IAEI Magazine’s breakdown of NEC and OSHA GFCI rules explains the requirements.
Can I plug several work lights into one extension cord?
You can with LEDs, as long as the total load stays well within the cord’s rating and you aren’t also running heavy tools on it. Never chain extension cords together. ESFI’s extension cord safety tips list the main dos and don’ts.
What color temperature is best for renovation work lights?
For general work and painting, 4000K to 5000K gives neutral, honest light. Check final paint colors under the bulbs you’ll actually install in the room. Lowe’s work light buying guide covers styles and features to compare.
References
Occupational Safety and Health Administration. 29 CFR 1926.56, Illumination.
Federal Register. Construction Illumination, Proposed Rule, July 1, 2025.
SafetyIQ. OSHA Lighting Standards and Requirements Every Facility Manager Should Know.
Electrical Contractor Magazine. Look on the Bright Side: Lighting and Illumination in the Workplace.
IAEI Magazine. NEC and OSHA: Protecting Workers From Electrical Shock.
Occupational Health and Safety. Temporary Electrical Power.
Electrical Safety Foundation International. Extension Cord Safety.
Gibson Insurance. Personal Risk Management: Electrical Safety at Home.
Ledlenser. CRI: An Explanation of the Colour Rendering Index for LED Lighting.
JourneymanHQ. 9 Essential Raking Light Tools for Spotting Drywall Imperfections.
Toolnut. Festool Syslite STL 450 Surface Inspection Light.
Bob Vila. The Best Work Lights for the Workshop or Jobsite, Tested.
Lowe’s. Choosing the Best Work Light.
ConstructConnect. Construction Lighting: Ins and Outs of Illuminating Your Worksite.