
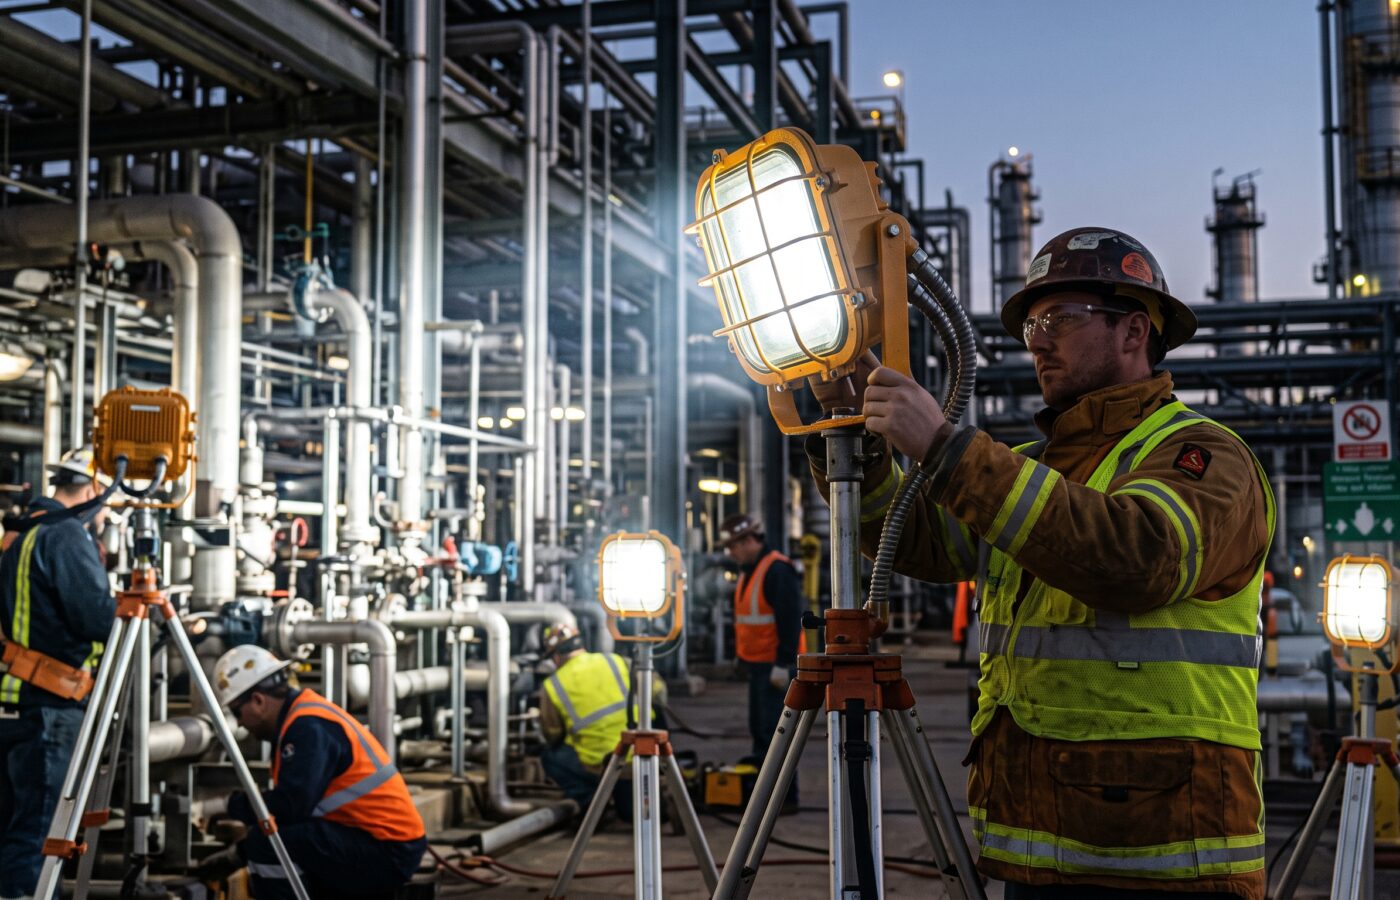
Explosion-Proof LED Work Lights: What Contractors on Industrial Sites Need to Know

The first time I stopped a job over a work light, the crew thought I was overreacting. We were inside a tank farm during a turnaround, and a contractor had hung a bright LED flood from a scaffold rail so his team could see the flange they were unbolting. It was a good light, a perfectly capable industrial LED flood light, but it was not an explosion proof work light. In fact, it carried an IP rating, a drop rating, and the word “industrial” in big letters on the box. Still, nothing on its nameplate said anyone could use it where gasoline vapor might collect. As a result, one loose connection or one cracked lens could have turned that fixture into the ignition source.
I have spent most of my career as an electrical safety engineer. I review hazardous area classifications, sign off on temporary power plans, and walk sites with contractors who know their trades well but never learned how to read a hazardous location marking. For that reason, this article covers what I wish every contractor knew before bringing a single light onto an industrial site. So if you buy, rent, or specify an explosion proof work light, treat this as your field guide.
What an Explosion Proof Work Light Actually Is
Most people hear “explosion proof” and assume the light cannot explode. However, the term means something else, and that misunderstanding causes real problems.
An explosionproof enclosure assumes that flammable gas or vapor will eventually get inside it. The design goal, therefore, is simple: if that gas ignites inside the housing, the enclosure holds the blast, and the escaping gases cool enough that they cannot set off the atmosphere outside. That is why manufacturers build these housings with thick cast walls, long machined flame paths, and threaded joints that crews must fully make up.
Because of this, a dented housing, a stripped thread, or a missing cover bolt counts as more than cosmetic damage. Any of those defects can break the flame path. Once that happens, the fixture becomes just an ordinary light that happens to look tough.
Explosionproof Versus Intrinsically Safe
Sales copy often uses the term loosely. For example, some portable lights that vendors describe as explosion proof actually carry intrinsic safety certification, which is a different protection method altogether. Intrinsically safe equipment keeps its electrical and thermal energy so low that it cannot ignite the hazard, even when something fails. Both methods are legitimate. What really matters is that the certification covers the exact location where you plan to use the light.
The Law Behind the Explosion Proof Work Light Label
On US industrial sites, two documents drive everything: the National Electrical Code (NFPA 70) and OSHA’s electrical standards. The NEC tells designers how to classify areas and what equipment they may use. Meanwhile, OSHA makes those rules enforceable at work.
Under OSHA’s general industry rule, any equipment in a hazardous (classified) location must be intrinsically safe, approved for that location, or otherwise safe for it. Similarly, construction work falls under its own parallel standard at 29 CFR 1926.407, alongside the broader job site lighting requirements, and the logic stays the same. In other words, if someone has classified the area, your light needs an approval that matches that classification. A general claim that a product is rugged or sealed simply does not count.
Contractors also rarely see one more requirement, although they should always ask about it. OSHA expects facilities to document their classified areas properly. In practice, that documentation takes the form of an area classification drawing. So if the facility owner cannot show you one for your work area, talk with their safety or engineering team before you plug anything in.
Reading the Nameplate on an Explosion Proof Work Light
Every legitimate explosion proof work light carries a permanent marking. Fortunately, learning to read it takes about ten minutes, and that skill will save you from the most common mistakes I see.
Class: What Kind of Hazard
The Class tells you what type of material creates the risk. First, Class I covers flammable gases and vapors. Next, Class II covers combustible dust. Finally, Class III covers ignitable fibers and flyings.
Refineries, fuel terminals, paint booths, and chemical plants usually fall under Class I. By contrast, grain elevators, flour mills, sugar plants, and some metal finishing shops often fall under Class II. Even a warehouse work light in a feed or flour distribution center may need a Class II rating. Textile mills and woodworking shops, meanwhile, can fall under Class III.
This is exactly where many contractors get caught. A light rated for Class I does not automatically suit a dusty area. After all, dust behaves differently from gas. It settles on hot surfaces, insulates them, and can smolder. Consequently, a fixture that works safely in a vapor area can still run too hot under a layer of grain dust.
Division: How Often the Hazard Is Present
The Division tells you how likely the hazard is to be present. In Division 1, the hazard exists during ordinary operating conditions. In Division 2, on the other hand, it shows up only during abnormal conditions such as a leak or equipment failure.
Division 1 sets the harder test. Generally, you can use a Division 1 light in a Division 2 area for the same Class and Group. The reverse, however, does not work. In fact, one of my most frequent audit findings involves a Division 2 fixture that drifted into a Division 1 area because someone needed more light near a pump seal or a manway.
Group: Which Specific Material
Groups narrow things down further. Class I includes Groups A through D. To illustrate, Group A covers acetylene, Group B covers hydrogen and similar gases, Group C includes ethylene, and Group D covers propane, gasoline, and many common hydrocarbons. Class II, meanwhile, uses Groups E, F, and G for metal dusts, carbon dusts, and grain or plastic dusts.
Pay close attention here. Plenty of fixed explosionproof floodlights carry ratings for Groups C and D only. That works fine at a fuel depot, but it falls short in a hydrogen area or near acetylene cylinders. Therefore, if the facility drawing calls for Group B, a Group C and D light will not do, no matter how good it is otherwise.
Temperature Codes on an Explosion Proof Work Light
Even if a light never sparks, its surface can still get hot enough to ignite the atmosphere. Every flammable material has an autoignition temperature, and the T code on an explosion proof work light tells you the maximum surface temperature it can reach.
How the T Code Scale Works
The scale runs from T1 at 450°C down to T6 at 85°C. In short, a higher T number means a cooler fixture. For instance, a T6 fixture stays at or below 85°C (185°F) on its surface, while T4 caps it at 135°C and T3 at 200°C.
The rule itself is simple. Your fixture’s maximum surface temperature must stay below the autoignition temperature of the material in that area. Most hydrocarbons, for example, sit comfortably with T3 or T4. Some materials, however, are far more sensitive. Carbon disulfide ignites at roughly 90°C, which effectively demands a T6 fixture. Ideally, your facility’s classification documents list the required T code. If they do not, ask.
The Ambient Temperature Trap
Here is a detail most people miss. A T code holds true only when you use the light within its rated ambient temperature. Many manufacturers rate their fixtures for 40°C ambient. Now picture one next to a hot process line, inside a sunbaked tank in July, or beside steam tracing. In those spots, the surrounding air may exceed that rating, and the nameplate T code no longer describes how hot the fixture will get. Indeed, I have measured enclosure skins inside summer turnaround vessels that ran well beyond what the crew assumed. So check the ambient range on the label, and then compare it honestly with the actual conditions.
Zones Versus Divisions
You will see two systems on nameplates and drawings, and you cannot swap one for the other freely.
The Division system above reflects the traditional North American approach. The Zone system, in contrast, comes from international IEC practice, and the NEC permits it as an alternative. It splits gas hazards into three levels instead of two. Roughly speaking, Zone 0 and Zone 1 together match Division 1, while Zone 2 lines up with Division 2.
Why the Match Is Only Approximate
The catch is that the two systems use different methods. As a result, a listing under one system does not automatically satisfy the other without a documented cross reference. So if your site uses Zones and your rental light carries only a Division marking, do not guess. Instead, get confirmation from the facility’s electrical engineer or the manufacturer.
This matters even more on multinational projects. For example, a light carrying only ATEX or IECEx markings may be excellent equipment. Even so, it may not satisfy the authority having jurisdiction on a US site without a matching North American listing.
The Standards Behind a Credible Explosion Proof Work Light
In the United States, testing labs typically evaluate fixed and portable luminaires for classified areas under UL 844, Luminaires for Use in Hazardous (Classified) Locations. Today, that standard also reaches beyond the Division system and covers Class I Zones 1 and 2 as well as dust Zones 20, 21, and 22.
Battery powered handheld and portable lights, on the other hand, sometimes follow a different route and earn certification under UL 913, the intrinsic safety standard. That does not make it a lesser rating. Rather, it reflects a different protection method. Either way, the marking on the light needs to match the Class, Division or Zone, Group, and T code of your work area.
Look for a certification mark from a nationally recognized testing laboratory such as UL, CSA, ETL, or FM on the fixture itself. Keep in mind that a spec sheet claim is not a marking. Over the years, I have seen imported lights with impressive spec sheets and no listing anywhere on the housing. Those lights stay in the truck.
Why LED Changed the Game, and What It Did Not Change
When I started in this field, crews relied mostly on incandescent, fluorescent, or metal halide lights in hazardous areas. They were heavy and hot, and the lamps broke often. Worse, metal halide fixtures took minutes to restrike after a power blip, which left crews standing in the dark inside a vessel. LED technology fixed a lot of that, much as it did in the broader LED work light vs halogen shift on ordinary jobsites.
LED fixtures produce far more light per watt. Consequently, they draw less current, need lighter cords, and give off less heat for the same output. Lower heat often earns a better T code, which in turn opens up more applications. In addition, LEDs turn on instantly and tolerate vibration much better than filament or arc lamps. On a turnaround, where crews drag, drop, and move lights every shift, that durability really matters.
Still, LED did not change the physics of ignition. The LED chips run cool, but the driver electronics still generate heat and can still fail. Likewise, the enclosure still has to contain an internal ignition or keep energy below the ignition threshold. Put simply, a cheap LED in a weak housing is no safer than an old incandescent in a weak housing. So do not let the efficiency of the light source make you relaxed about the certification of your explosion proof work light.
Choosing the Right Explosion Proof Work Light for the Job
Once you know the classification of your work area, selecting an explosion proof work light becomes much more straightforward. Here is the order I walk contractors through.
Start With the Classification Drawing
First, write down the Class, Division or Zone, Group, and required T code before you open any catalog. Everything else comes second.
Pick the Format and Power Source
Next, decide between portable, mounted, and handheld units. Inside confined spaces such as tanks and vessels, I usually prefer low voltage or battery powered lights, since they keep line voltage cords out of the manway. For general area lighting around a unit, rated versions of the familiar tripod work light or A frame floodlights cover large areas well. For inspection work, meanwhile, a certified handheld with a focused beam usually performs best.
Then think carefully about power. Corded lights give you unlimited runtime, but they also bring cords, plugs, and connection points into the hazardous area, and each of those needs its own rating. For example, plugging a Class I Division 1 light into an ordinary receptacle inside the classified boundary defeats the whole purpose. Battery lights, by contrast, remove the cord problem, although you must know where you can charge them. Unlike an everyday rechargeable work light for contractors, many rated rechargeable units allow charging only outside the classified area, and some prohibit battery swaps inside it. Therefore, read the manual and follow it. A solar rechargeable work light without a hazardous location rating belongs only outside the boundary as well.
Size the Output and Match the Environment
After that, size the light output to the task. Confined space work rarely needs a 14,000 lumen flood that blinds the crew. Large tank interiors and outdoor process areas at night, however, may need exactly that. Also consider glare, shadows at the work point, and whether the job calls for a wide flood or a narrow spot. In my experience, a color temperature around 4000K to 5000K helps workers see contrast and read gauges.
Beyond the hazard itself, match the physical environment. IP66 or IP67 ratings, for instance, tell you how well the fixture resists dust and water jets. Likewise, corrosive atmospheres at chemical plants or coastal facilities call for coated aluminum, stainless hardware, or other corrosion resistant materials. Washdown areas, similarly, need appropriate seals.
Be careful with added features too. The Bluetooth modules and app controls found on many smart LED work lights, or the sensor electronics in a motion sensor work light, are more circuitry that the hazardous location certification must cover. If the listing doesn’t include them, the light doesn’t qualify.
Check the Cord and Plug Ratings
Finally, look at the whole system on corded portable lights. The cord should be an extra hard usage type suitable for the location. Moreover, if you will connect the plug inside the hazardous area, it needs the same classification as the light. After all, a rated fixture on an unrated cord is an unrated system.
Explosion Proof Work Light Mistakes I See Most Often
After years of site walks, I keep running into the same problems. Fortunately, each one is easy to prevent.
Rating and Classification Errors
Using a “rugged” light instead of a rated one. Impact resistance, waterproofing, and dustproofing are good qualities, but none of them amount to a hazardous location approval. In short, if the nameplate lacks a Class, Division, or Zone marking, the light is not an explosion proof work light, regardless of what the packaging says. The same goes for a handy magnetic work light or the compact work lights electricians use in tight spaces. They are excellent tools elsewhere, but they stay outside the boundary. Trades who move between sites get caught by this too, such as techs carrying their usual LED work light for HVAC service onto a refinery rooftop.
Ignoring the Group letters. Because Groups C and D are so common, crews often assume every rated light covers every gas. Hydrogen and acetylene areas, however, need Group B or A.
Mixing Class I and Class II. Bringing a gas rated light into a grain or powder handling area without a Class II rating remains a frequent finding.
Running the light past its ambient rating. Hot vessel interiors and areas near process heat often exceed 40°C, so check the label every time.
Handling and Maintenance Errors
Damaging the flame path. Explosionproof housings depend on precise joints. In fact, the NEC requires at least five fully engaged threads on threaded entries, with a small allowance of four and a half threads for listed equipment with factory threads. On portable fixtures, a cross threaded cover, a lost bolt, or a gouge on a machined face can compromise the design. Whenever you find damage like that, tag the light out.
Opening or servicing energized fixtures in the classified area. Lens cleaning, lamp access, and battery changes should follow the manufacturer’s instructions. Many explosionproof fixtures, for example, warn you to disconnect power and wait before opening the cover. That warning exists because internal components may still be hot.
Assuming rental equipment is correct. Rental fleets usually do good work, but lights get mixed up on returns. For that reason, inspect the nameplate on every unit that arrives, not just the first one.
Inspecting and Maintaining Your Explosion Proof Work Light
Even the best explosion proof work light becomes a liability without maintenance. That is why I tell contractors to build a short inspection into their daily routine rather than into a binder nobody opens.
A Simple Daily Check
Before each use, examine the housing for cracks, dents, and missing fasteners. Then confirm the lens or globe has no chips and the guard is intact. After that, run your hand along the full length of the cord to find cuts, crushed sections, and exposed conductors, paying special attention near the strain relief where cords tend to fail. Also verify that the plug body has no cracks and the pins sit straight. On battery units, finally, check the compartment seals, confirm the charge indicator works, and know your expected LED work light battery life so no one is tempted to swap packs inside the boundary mid shift.
When Something Looks Wrong
If anything looks wrong, take the light out of service and tag it. Above all, do not field repair explosionproof enclosures with tape, silicone, or spare screws from the toolbox. Instead, follow the manufacturer’s repair instructions, which often require factory parts, because otherwise the certification no longer applies.
In addition, keep a simple log that ties each light’s serial number to its inspections. Then, when an incident investigator or auditor asks how you knew a fixture was safe on a particular day, that log gives you the answer.
Who Decides the Classification
Contractors sometimes ask me to tell them what rating they need. My answer is always the same: the facility owner decides, and the contractor verifies.
Area classification is an engineering exercise. Typically, a licensed engineer works with the owner to examine the process and equipment, and then maps the regions that need classification. Industry documents like API RP 500 for petroleum facilities, along with NFPA 497 and 499, support that work. The resulting drawing then shows the boundaries, Classes, Divisions or Zones, and Groups.
Your job as a contractor, therefore, is to request that information, understand it, and make sure everything you bring inside those boundaries matches it. During turnarounds, though, temporary conditions such as open vessels, drained lines, and purging operations can make an area more hazardous than its normal classification. Good owners handle this by issuing a hot work permit or a temporary classification review. Likewise, if you notice conditions that do not match the drawing, such as a vapor smell, a gas detector alarm, or an open process line, stop and raise it.
Final Thoughts From the Field
I have never investigated an incident where the root cause was a contractor who asked too many questions about a light. On the other hand, I have reviewed plenty where nobody asked at all.
An explosion proof work light is a simple tool that carries a lot of responsibility. So read the nameplate, match it to the classification drawing, respect the T code and ambient limits, inspect it every day, and pull it from service the moment something looks wrong. If you do that consistently, you remove one of the most common ignition sources on an industrial site. Ultimately, that protects your crew, the facility, and your company’s ability to keep working there.
Frequently Asked Questions About the Explosion Proof Work Light
What is the difference between an explosion proof work light and an intrinsically safe light?
An explosionproof light uses a heavy enclosure that contains any internal ignition and cools the escaping gases. An intrinsically safe light, by contrast, limits its electrical and thermal energy so it cannot cause ignition at all, even under fault conditions. Both can carry approval for hazardous locations, and the marking tells you which method applies. Learn more: OSHA 29 CFR 1910.307.
Can I use a Class I Division 2 explosion proof work light in a Division 1 area?
No. Division 1 areas have the hazard present under normal conditions, so they require equipment approved for Division 1. You can generally use a Division 1 light in Division 2 for the same Class and Group, but the reverse is not permitted. Further reading: EC&M: NEC Class and Division Basics.
What does the T code on an explosion proof work light mean?
The T code shows the maximum surface temperature the fixture can reach within its rated ambient temperature. T6 marks the coolest rating at 85°C, while T1 marks the hottest at 450°C. In every case, the rating must stay below the autoignition temperature of the material in your work area. Details here: Acuity Brands: Hazardous Ratings Explained.
Is a light rated for gas areas safe for dusty areas?
Not automatically. Class I covers gases and vapors, whereas Class II covers combustible dust. Therefore, you need a light specifically approved for Class II wherever combustible dust is present. For background: EC Mag: How to Determine and Classify Hazardous Locations.
Which standard should a hazardous location luminaire be certified to?
In the US, testing labs commonly evaluate luminaires for classified locations under UL 844. Some portable battery lights, however, carry intrinsic safety certification under UL 913. Either way, look for the listing mark on the fixture itself. Standard overview: UL 844 on GlobalSpec.
Can I charge an explosion proof work light inside the hazardous area?
Only if the manufacturer’s instructions and certification allow it. Many rechargeable lights require charging and battery changes outside the classified boundary, so always follow the manual for your specific model. Related guidance: EC&M: An Inside Look at Hazardous (Classified) Locations.
Who decides the hazardous classification of my work area?
The facility owner decides, typically through a licensed engineer who prepares an area classification drawing. Contractors, in turn, should request that drawing and match all equipment to it. More on the process: UTI Engineering: Electrical Area Classification.
References
- OSHA. 29 CFR 1910.307, Hazardous (Classified) Locations.
- Cornell Law School, Legal Information Institute. 29 CFR § 1910.307.
- J. J. Keller. 1910.307 Hazardous (Classified) Locations.
- EC&M. NEC Class and Division Basics.
- EC&M. Understanding Requirements for Hazardous Locations.
- EC&M. An Inside Look at Hazardous (Classified) Locations.
- Electrical Contractor Magazine. Tradition Meets Alternative: How to Determine and Classify Hazardous Locations.
- Acuity Brands. Hazardous Ratings Explained.
- UL Standards & Engagement. UL 844, Luminaires for Use in Hazardous (Classified) Locations (via GlobalSpec).
- Fabrico. Hazardous Area Classification: ATEX and IECEx Zones Explained.
- UTI Engineering. Electrical Area Classification.
- Super Bright LEDs. Explosion Proof Lighting Guide.